

Preserving Fresh Herbs: Drying, Freezing & Infusing for Year-Round Flavor
A few of the product links in this guide are affiliate links. If you buy through one, Ambitious Harvest may earn a small commission at no extra cost to you, which helps keep these guides free. We only point to gear we would use in our own Santa Cruz garden. As an Amazon Associate, we earn from Read our full disclosure.
There's a moment every summer when your herb garden shifts from "just enough" to "more than you could possibly use fresh." Basil bushes out. Mint takes over its corner. Oregano and thyme produce faster than any recipe demands. That abundance is a gift, but only if you know how to preserve it.
Fresh herbs taste best, of course. But properly preserved herbs capture much of that garden flavor for winter cooking when fresh options are limited. And in Santa Cruz County, where many herbs produce year-round, preservation lets you process summer's peak harvests while your plants continue growing.
This guide covers every practical method for preserving herbs: drying (with specific techniques for our coastal humidity), freezing (far better than you might think), and infusing into oils, vinegars, butters, and salts. You'll learn which methods work best for which herbs and how to maximize flavor in everything you preserve.
When Should You Harvest Herbs for Preserving?
The quality of your preserved herbs depends entirely on what you start with. Harvest timing and technique matter more for preservation than for fresh use.
When to Harvest
Time of day: Harvest in mid-morning after dew has dried but before afternoon heat. Essential oils (where flavor lives) are most concentrated at this time.
Stage of growth: Harvest before flowering for strongest flavor. Once herbs flower, they redirect energy toward seed production and leaves become less flavorful. For herbs like basil that you're actively preventing from bolting, preservation harvests do double duty.
Season: For preservation, harvest during peak production when plants are vigorous. In Santa Cruz County, this varies by herb: basil peaks in July through September, while Mediterranean herbs like rosemary and thyme can be harvested year-round with fall often producing the most flavorful leaves.
How to Harvest
Cut, don't pull: Use clean scissors or pruning shears. Tearing damages stems and can introduce decay.
Take stems, not just leaves: For most herbs, harvest 4 to 6-inch stem tips. This gives you handling material during processing and encourages bushier regrowth.
Leave enough for regrowth: Never take more than one-third of the plant at once. Herbs need leaves to photosynthesize and recover.
Inspect for pests: Check for aphids, spider mites, or other hitchhikers. Rinse if needed and dry completely before preserving.
Washing and Drying
To wash or not: If your herbs are clean and pest-free, skip washing. Water is the enemy of preservation, and every bit of moisture you add must be removed. If you must wash (visible dirt, bugs), rinse quickly in cool water and dry thoroughly with towels or a salad spinner before processing.
Completely dry: Herbs must be absolutely dry before any preservation method. Moisture leads to mold in dried herbs, ice crystals in frozen herbs, and dangerous bacteria in oil infusions.
Drying Herbs: Four Methods for Santa Cruz Gardens
Drying is the oldest and simplest preservation method. It works by removing moisture so bacteria and mold can't grow. But Santa Cruz County's coastal humidity creates challenges for traditional air-drying that inland gardeners don't face.
Which Herbs Dry Best
Excellent for drying (retain flavor well):
Rosemary
Thyme
Oregano
Sage
Bay leaves
Marjoram
Savory
Good for drying (some flavor loss):
Mint
Lavender
Dill (seeds better than leaves)
Parsley (though freezing is better)
Poor for drying (significant flavor loss):
Basil (turns black, loses flavor; freeze instead)
Chives (freeze instead)
Cilantro (loses almost all flavor; freeze or use fresh)
Tarragon (loses flavor; freeze instead)
Method 1: Air Drying (Best for Inland Areas)
Traditional air drying works well in low-humidity environments but struggles on the Santa Cruz coast. Foggy conditions slow drying and increase mold risk.
Where it works: Inland Santa Cruz County (Scotts Valley, parts of Watsonville, Boulder Creek sunny exposures) during dry summer months.
Where it struggles: Coastal areas, anywhere with persistent fog, during winter.
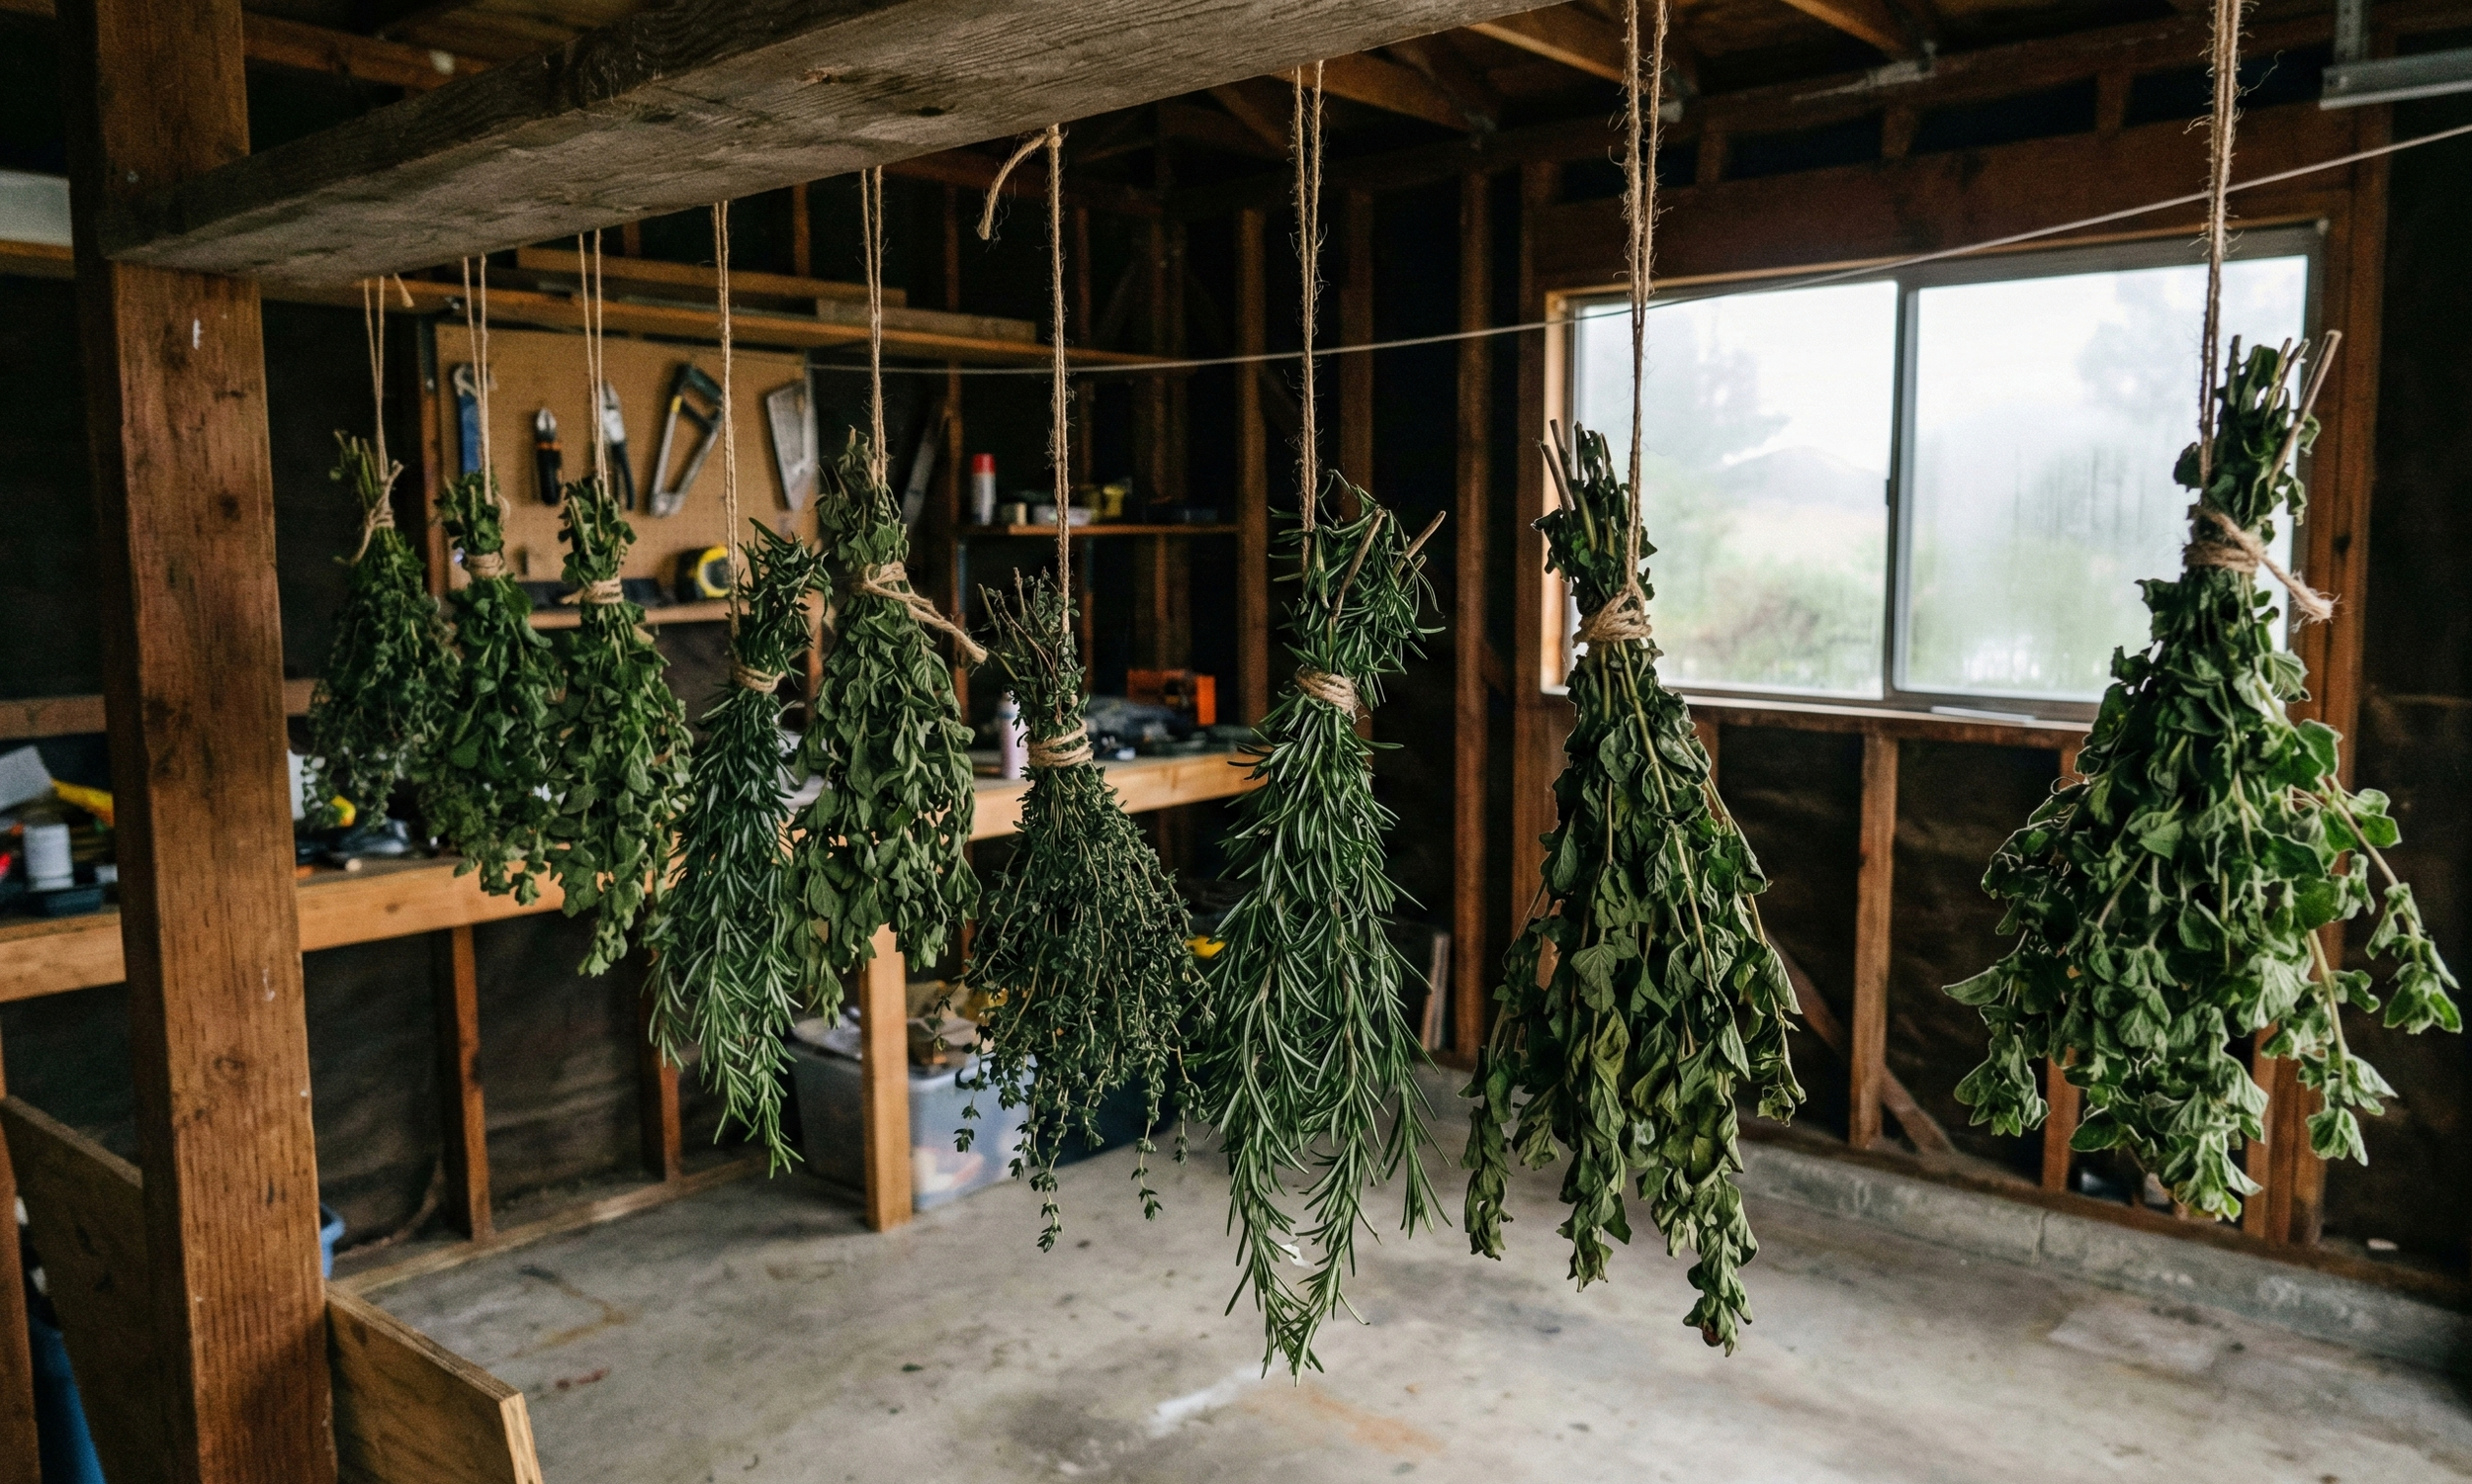
How to air dry:
Gather small bundles of 4-6 stems and tie with string or rubber bands
Hang upside down in a warm, dark, well-ventilated area
Allow 1-2 weeks until completely dry and brittle
Strip leaves from stems and store
Signs of problems: If leaves feel leathery rather than crispy after 2 weeks, or if you see any mold, the environment is too humid. Switch to a faster method.
Method 2: Dehydrator Drying (Best for Coastal Areas)
A food dehydrator is the most reliable method for Santa Cruz County, especially coastal gardens. It removes moisture quickly regardless of ambient humidity.
Why it works here: Controlled heat and airflow dry herbs in hours instead of weeks, eliminating humidity concerns.
Equipment: Any food dehydrator with temperature control. Set to 95°F to 115°F for herbs (higher temperatures destroy essential oils).
How to dehydrate:
Remove leaves from stems (or lay small-leaved herbs like thyme in single layers on stems)
Arrange in single layers on dehydrator trays
Dehydrate at 95°F to 105°F for 2-4 hours
Check hourly after 2 hours; herbs are done when crispy and crumbly
Cool completely before storing
Dehydrator tips:
Don't overcrowd trays; air needs to circulate
Rotate trays if your dehydrator heats unevenly
Different herbs may finish at different times; remove each as done
Lower temperatures (95°F) preserve more flavor but take longer
Method 3: Oven Drying (Quick but Requires Attention)
Oven drying works when you don't have a dehydrator, but requires careful temperature control.
How to oven dry:
Preheat oven to lowest setting (usually 170°F to 200°F)
Spread herbs in single layer on baking sheets lined with parchment
Prop oven door open slightly to allow moisture to escape
Check every 15-30 minutes
Remove when completely dry and crispy (usually 1-4 hours)
Oven drying challenges:
Most ovens' lowest setting is too hot (above 200°F damages flavor)
Requires frequent checking and door propping
Easy to over-dry or scorch
Less consistent results than dehydrator
Best for: Quick processing when you don't have a dehydrator, small batches, hardier herbs like rosemary and oregano that tolerate heat better.
Method 4: Microwave Drying (Fastest, Small Batches)
Microwave drying is surprisingly effective for small quantities and produces excellent results when done correctly.
How to microwave dry:
Place clean, dry herbs between two paper towels
Microwave on high for 1 minute
Check and rearrange; continue in 20-second bursts
Stop when herbs are dry and crispy (usually 2-3 minutes total)
Let cool completely
Microwave tips:
Start with small quantities (1/2 cup leaves at a time)
Watch carefully; herbs can scorch quickly
Different microwaves vary; learn your appliance
Works best for sturdy herbs (rosemary, thyme, oregano)
Best for: Small batches, when you need dried herbs quickly, testing before committing to larger quantities.
Storing Dried Herbs
Proper storage is as important as proper drying. Dried herbs last 1-3 years but lose flavor over time.
Storage containers: Glass jars with tight lids (Mason jars work perfectly). Avoid plastic, which can absorb odors.
Storage conditions: Cool, dark, dry location. A pantry or cabinet away from the stove is ideal. Avoid storing near windows or in humid areas.
Whole vs. ground: Store leaves whole; crush just before using for best flavor retention. Ground herbs lose flavor faster.
Labeling: Always label with herb name and date. You'll forget what that jar of green stuff is, and older herbs should be used first.
Testing for doneness: If herbs feel at all soft or bendable, they're not dry enough and will mold in storage. Return to drying until completely brittle.
Freezing Herbs: Better Than You Think
Freezing is underrated for herbs. While frozen herbs won't work for fresh garnishes, they're excellent for cooking, often superior to dried for herbs that don't dry well.
Which Herbs Freeze Best
Excellent for freezing:
Basil (far better than drying)
Cilantro
Chives
Parsley
Dill
Mint
Tarragon
Good for freezing:
Oregano
Thyme
Sage
Rosemary
Note: Hardy Mediterranean herbs (rosemary, thyme, oregano) dry so well that freezing offers less advantage, but it's still effective.
Method 1: Flash Freezing Whole Leaves
The simplest method. Works for any herb.
How to flash freeze:
Wash herbs if needed and dry completely
Remove leaves from stems
Spread in single layer on a parchment-lined baking sheet
Freeze for 1-2 hours until solid
Transfer to freezer bags or containers
Remove as much air as possible
Label and return to freezer
Advantages: Quick, herbs remain separate (easy to grab what you need), no special equipment.
Disadvantages: Herbs discolor over time, texture becomes limp when thawed.
Best for: Herbs you'll add to cooked dishes (soups, sauces, stir-fries).
Method 2: Herb Ice Cubes
Freezing herbs in water or oil creates convenient cooking portions and protects herbs from freezer burn.
How to make herb ice cubes:
Chop herbs (or leave small leaves whole)
Pack into ice cube trays, filling about 2/3 full
Cover with water, olive oil, or melted butter
Freeze until solid
Pop cubes out and transfer to freezer bags
Label with herb and date
Water cubes: Good for herbs you'll add to soups, stews, or sauces where extra liquid is welcome. Works for any herb.
Oil cubes: Perfect for herbs you'll sauté (basil, oregano, thyme, rosemary). The oil protects flavor and makes it easy to drop a cube straight into a hot pan.
Butter cubes: Make compound butter portions. Great for finishing steaks, melting over vegetables, or tossing with pasta.
Portion tip: Standard ice cube trays make roughly 1 tablespoon cubes. Mini ice cube trays make approximately 1 teaspoon portions.
Method 3: Herb Pastes
Blending herbs with oil creates a paste that freezes beautifully and is ready to use in cooking.
Basic herb paste:
Combine 2 cups packed fresh herbs with 1/2 cup olive oil in a food processor or blender
Process until smooth (or leave slightly chunky if preferred)
Spoon into ice cube trays or spread in thin layer in freezer bags
Freeze, then transfer cubes to bags or break off pieces as needed
Paste variations:
Pesto base: Basil + garlic + oil (add cheese and nuts after thawing)
Chimichurri base: Parsley + oregano + garlic + oil
Herb blend: Mixed herbs of your choice
Advantages: Concentrated flavor, ready to add to cooking, protects herbs from freezer burn.
Best for: Basil (makes excellent frozen pesto base), parsley, cilantro, mixed herb blends.
Method 4: Blanching Before Freezing
Blanching (brief boiling followed by ice bath) preserves color and reduces enzyme activity that causes flavor loss. Worth the extra step for herbs you want to keep green.
How to blanch herbs:
Bring a pot of water to boil
Prepare a bowl of ice water
Dip herbs in boiling water for 5-10 seconds only
Immediately plunge into ice water
Drain and dry thoroughly
Freeze using any method above
Best for: Basil (stays green instead of turning black), parsley, chives, any herb where color matters.
Skip blanching for: Herbs going into dark-colored dishes, or when you're short on time.
Freezer Storage Tips
Storage life: Frozen herbs maintain best quality for 3-6 months but remain safe indefinitely.
Freezer burn prevention: Remove as much air as possible from bags. Double-bag if storing long-term.
Labeling: Always label with herb name and date. Frozen herbs look similar and you'll forget.
Using frozen herbs: Don't thaw; add directly to hot dishes. Thawed herbs become mushy and are only suitable for cooking, not fresh use.
Infusing Herbs: Oils, Vinegars, Butters & Salts
Infusions extract herb flavors into another medium, creating versatile cooking ingredients that last for months.
Herb-Infused Oils
Herb oils add instant flavor to cooking. But oil infusions require food safety attention because of botulism risk from low-acid, anaerobic environments.
SAFETY WARNING: Fresh herbs in oil can support botulism growth. Always refrigerate fresh herb oils and use within 1-2 weeks, or use dried herbs for longer storage.
Fresh Herb Oil (Refrigerate and Use Quickly)
How to make:
Wash herbs and dry completely (moisture promotes bacteria)
Bruise or chop herbs lightly to release oils
Place in clean jar and cover with oil (olive oil is traditional)
Refrigerate immediately
Use within 1-2 weeks
Best herbs for fresh oil: Basil, rosemary, thyme, oregano, garlic, chives.
Uses: Drizzling on finished dishes, bread dipping, salad dressings, marinades.
Dried Herb Oil (Shelf-Stable)
Using dried herbs eliminates the botulism risk and creates shelf-stable oils.
How to make:
Combine dried herbs with oil in a clean jar (1 tablespoon dried herbs per cup of oil)
Let infuse at room temperature for 1-2 weeks, shaking occasionally
Strain out herbs
Store in cool, dark place for up to 6 months
Heat infusion method: Gently heat oil and dried herbs to 180°F for 10 minutes, then cool and strain. Faster but may alter flavor slightly.
Herb-Infused Vinegars
Vinegar's acidity makes herb vinegars safe for room-temperature storage. They're simple to make and last indefinitely.
How to make herb vinegar:
Wash and dry fresh herbs
Bruise herbs lightly and place in clean glass jar
Heat vinegar to just below boiling (do not boil)
Pour hot vinegar over herbs
Cool, cover, and let infuse for 2-4 weeks
Strain out herbs and transfer to clean bottles
Store at room temperature indefinitely
Best vinegar bases:
White wine vinegar: Mild, lets herb flavor shine; good for tarragon, chives, dill
Red wine vinegar: Bolder; good for rosemary, oregano, thyme
Apple cider vinegar: Slightly sweet; good for sage, mint, mixed herbs
Rice vinegar: Light, mild; good for cilantro, ginger, Asian-inspired blends
Best herbs for vinegar:
Tarragon (classic French combination)
Chives (with or without flowers; flowers add pink color)
Dill
Rosemary
Thyme
Sage
Mixed herb blends
Uses: Salad dressings, marinades, deglazing pans, pickling, adding to sauces.
Compound Herb Butters
Compound butters are simply butter blended with herbs and other seasonings. They freeze beautifully and add instant flavor to any dish.
Basic compound butter:
Soften 1/2 cup (1 stick) butter to room temperature
Mix in 2-4 tablespoons finely chopped fresh herbs
Add salt to taste (start with 1/4 teaspoon)
Add any additional seasonings (garlic, lemon zest, pepper)
Mix thoroughly
Roll in plastic wrap into a log shape
Refrigerate or freeze
Classic combinations:
Garlic herb butter: Butter + parsley + chives + garlic + lemon zest. Perfect for garlic bread, steaks, roasted vegetables.
Rosemary butter: Butter + rosemary + garlic + black pepper. Excellent on lamb, potatoes, crusty bread.
Sage brown butter base: Butter + sage. Brown the butter with sage leaves for pasta, ravioli, or squash.
Dill butter: Butter + dill + lemon zest. Perfect for fish, salmon, seafood.
Mint butter: Butter + mint + a touch of honey. Traditional with lamb, also lovely on peas or carrots.
Basil butter: Butter + basil + garlic + parmesan. Toss with pasta or spread on grilled corn.
Storage: Refrigerate for up to 2 weeks; freeze for up to 3 months. Slice off coins as needed.
Herb Salts
Herb salts are ridiculously simple and incredibly useful. They last for months and make everything taste better.
How to make herb salt:
Combine 1 cup coarse salt (kosher or sea salt) with 1/2 to 1 cup finely chopped fresh herbs
Spread mixture on a baking sheet
Let dry at room temperature for 24-48 hours, stirring occasionally
Alternatively, dry in oven at 200°F for 1-2 hours
Store in airtight container
Variations:
Rosemary salt: Rosemary + salt + lemon zest. Classic for roasted potatoes, lamb, focaccia.
Herb de Provence salt: Lavender + thyme + rosemary + oregano + salt. Use on chicken, vegetables, eggs.
Garden herb salt: Mixed herbs (whatever you have) + salt. All-purpose finishing salt.
Celery salt variation: Use celery leaves (from your garden celery) + salt. Classic for Bloody Marys, potato salad.
Uses: Finishing salt for any dish, seasoning meat before cooking, rimming cocktail glasses, gift-giving.
Herb-by-Herb Preservation Guide
Different herbs preserve differently. Here's a quick reference for the best method for each common herb.
Basil
Best method: Freezing (paste, ice cubes, or blanched leaves) Why: Basil loses significant flavor and turns black when dried Second choice: Fresh oil (refrigerate and use within 2 weeks) Avoid: Air drying (poor results)
Chives
Best method: Freezing (flash frozen or ice cubes) Why: Chives don't dry well; freezing retains texture and flavor Second choice: Herb butter, herb salt Avoid: Drying (loses flavor and texture)
Cilantro
Best method: Freezing (paste or ice cubes) Why: Cilantro loses almost all flavor when dried Second choice: Herb vinegar Avoid: Drying (virtually no flavor remains)
Dill
Best method: Freezing (for leaves); drying (for seeds) Why: Dill leaves lose flavor when dried but seeds dry excellently Second choice: Herb vinegar Tip: If you grow dill, let some plants go to seed for drying
Mint
Best method: Drying (retains flavor reasonably well) Second choice: Freezing, herb vinegar, herb sugar (for tea blends) Tip: Mint dries faster than most herbs due to lower moisture content
Oregano
Best method: Drying (flavor actually intensifies) Why: Dried oregano is often preferred to fresh in many recipes Second choice: Freezing, oil infusion Tip: Greek oregano dries with the most flavor
Parsley
Best method: Freezing (ice cubes, paste) Why: Parsley loses significant flavor when dried Second choice: Herb butter, fresh oil (refrigerated) Tip: Flat-leaf (Italian) parsley freezes with better flavor than curly
Rosemary
Best method: Drying (excellent results) or fresh from garden (evergreen, available year-round) Why: Rosemary's sturdy leaves dry perfectly and retain flavor for years Second choice: Herb oil, herb salt, herb butter Note: In Santa Cruz, rosemary grows year-round; preservation may be unnecessary
Sage
Best method: Drying (excellent results) Why: Sage dries beautifully and retains flavor well Second choice: Herb butter (sage brown butter is classic), freezing Tip: Dry sage with stems intact; strip leaves when fully dry
Tarragon
Best method: Freezing or vinegar Why: Tarragon loses significant flavor when dried Classic use: Tarragon vinegar (essential for béarnaise sauce) Second choice: Herb butter
Thyme
Best method: Drying (excellent results) Why: Thyme's small, sturdy leaves dry quickly and retain flavor Second choice: Freezing, herb oil Note: In Santa Cruz, thyme grows year-round; fresh is often available
What Is the Santa Cruz Humidity Challenge?
Santa Cruz County's coastal fog and humidity create specific challenges for herb preservation that deserve attention.
Why Humidity Matters
For drying: High humidity slows drying dramatically. Herbs that would air-dry in a week in dry climates may take 3-4 weeks here, increasing mold risk. Coastal gardeners should use dehydrator or oven methods for reliable results.
For storage: Even properly dried herbs can reabsorb moisture in humid environments. Store dried herbs in truly airtight containers and check periodically for any softness.
Seasonal variation: Summer fog season (May through September on the coast) is actually the most challenging time for air-drying, even though it's peak herb season. Inland areas in summer have lower humidity and easier drying conditions.
Coastal Gardener Solutions
Invest in a dehydrator: The most reliable solution for consistent results regardless of weather.
Time your drying: If air-drying, choose a stretch of dry, sunny weather (more common October through April on the coast, ironically).
Prioritize freezing: For herbs that don't dry well anyway (basil, cilantro, chives), freezing sidesteps humidity issues entirely.
Dry indoors with climate control: If you have a room with air conditioning or heating that reduces humidity, use it for air-drying racks.
Use your oven's pilot light: Some gas ovens with pilot lights maintain low heat (100-150°F) that can dry herbs slowly overnight.
Frequently Asked Questions
Which preservation method retains the most flavor?
Freezing generally retains more fresh herb flavor than drying. But dried herbs concentrate flavor differently, sometimes intensifying it (oregano, thyme). For herbs that dry well, dried versions are often preferred in cooking. For herbs that don't dry well (basil, cilantro, chives), freezing is clearly superior.
How long do preserved herbs last?
Dried herbs maintain best quality for 1-3 years but lose flavor gradually. Frozen herbs are best within 3-6 months but remain usable longer. Herb vinegars last indefinitely. Herb oils with fresh herbs must be refrigerated and used within 1-2 weeks; dried herb oils last 6 months. Herb butters keep 2 weeks refrigerated, 3 months frozen. Herb salts last 6-12 months.
Why did my air-dried herbs get moldy?
Too much humidity, not enough air circulation, or herbs weren't completely dry before bundling. Coastal Santa Cruz gardens should use dehydrator or oven methods. If air-drying, use small bundles, hang in well-ventilated areas, and avoid drying during foggy weather.
Can I dry herbs in the sun?
Not recommended. Sun exposure degrades essential oils and reduces flavor. Dry herbs in warm, dark, well-ventilated areas instead.
Why did my frozen basil turn black?
Basil naturally oxidizes when frozen, turning dark. Blanching before freezing helps preserve green color. The darkened basil is still usable and flavorful, just not attractive. If color matters, blanch, or use basil in dishes where color doesn't show (sauces, soups).
Is it safe to make herb-infused olive oil?
Fresh herbs in oil can support botulism growth because of the low-acid, anaerobic environment. Always refrigerate fresh herb oils and use within 1-2 weeks. For longer storage, use dried herbs or acidify with vinegar. Never store fresh garlic in oil at room temperature.
What's the best container for storing dried herbs?
Glass jars with tight-fitting lids (Mason jars work perfectly). Avoid plastic, which can absorb oils and odors. Store in cool, dark locations; light degrades flavor.
Should I wash herbs before preserving?
Only if necessary (visible dirt, pests). Water is the enemy of preservation. If you must wash, dry herbs completely before processing. Any residual moisture leads to mold in dried herbs and ice crystals in frozen herbs.
Downloadable Guides
These free PDF guides support your herb garden:
Seasonal Planting Calendar: Know when to plant herbs for peak harvests.
Companion Planting Guide: Which herbs benefit your vegetables.
Garden Troubleshooting Guide: Quick fixes for common garden problems.
Know Your Microclimate Worksheet: Understand your garden's unique conditions.
Local Resources
UC Master Gardeners of Monterey and Santa Cruz Counties: Free gardening advice and food preservation resources.
San Lorenzo Garden Center: Local nursery with herb plants and gardening supplies.
Staff of Life: Local natural foods store with quality oils, vinegars, and salts for infusions.
Mountain Feed & Farm Supply: Canning supplies, dehydrators, and preservation equipment.
Final Thoughts
A productive herb garden generates abundance, and abundance deserves preservation. Whether you're freezing basil paste for winter pesto, drying oregano for year-round pizza, or making rosemary salt for holiday gifts, these techniques let you enjoy your garden's flavor long after the growing season shifts.
Start simple. Pick one method and one herb. Make a batch of frozen basil cubes or a jar of herb salt. Once you see how easy it is and how much flavor you've captured, you'll find yourself preserving herbs as naturally as you harvest them.
Your future self, pulling a cube of summer basil from the freezer on a rainy January evening, will thank you.
Related Articles
Herb Growing Guides
Growing Herbs in Santa Cruz County - Complete guide to growing culinary herbs
Growing Basil in Santa Cruz - Tips for our most popular summer herb
Growing Rosemary in Santa Cruz - The easiest Mediterranean herb
Growing Lavender in Santa Cruz - Fragrant, drought-tolerant beauty
Growing Mint in Santa Cruz - Vigorous grower for mojitos and more
Growing Thyme in Santa Cruz - Versatile culinary and cocktail herb
Growing Oregano in Santa Cruz - Mediterranean kitchen essential
Growing Sage in Santa Cruz - Savory herb for cooking and cocktails
Growing Parsley in Santa Cruz - The underrated two-year herb
Growing Cilantro in Santa Cruz - Cool-season favorite
Growing Dill in Santa Cruz - Quick-growing annual herb
Growing Chives in Santa Cruz - Easy perennial onion flavor
Herb Care & Preservation
Preventing Basil from Bolting - Keep basil productive all season
Special Topics
Growing Herbs for Cocktails - From garden to glass
Fire-Wise Herb Gardens - Low-growing, high-moisture plants for defensible space