

Growing Dill in Santa Cruz: From Seed to Harvest in Cool Seasons
A few of the product links in this guide are affiliate links. If you buy through one, Ambitious Harvest may earn a small commission at no extra cost to you, which helps keep these guides free. We only point to gear we would use in our own Santa Cruz garden. As an Amazon Associate, we earn from Read our full disclosure.
Dill presents Santa Cruz County gardeners with a pleasant puzzle. This feathery herb loves our mild climate but bolts (goes to flower) at the first hint of warm weather. Plant at the wrong time, and your dill shoots straight to seed before you've picked enough for a single batch of tzatziki. Plant at the right time, and you'll have abundant harvests of those delicate, anise-scented fronds that transform pickles, salmon, potato salads, and countless other dishes.
The secret to dill success here isn't complicated: work with our climate rather than against it. While gardeners in harsh climates squeeze dill into a brief summer window, we can grow it through our long, mild cool season. Fall, winter, and early spring are prime dill time in Santa Cruz County. Summer is for harvesting seeds, not leaves.
Once you understand dill's preferences, it becomes one of the easiest herbs to grow. Direct sow seeds, keep the soil moist, and harvest before flowers appear. This guide covers everything you need to know to keep fresh dill on hand year-round.
What Is Dill's Growth Cycle?
Dill (Anethum graveolens) is an annual herb, completing its entire life cycle in a single growing season. Understanding this cycle helps you plan for continuous harvests.
Germination and early growth: Dill seeds germinate in 7-14 days when soil temperatures are between 60-70°F. Young plants grow slowly at first, developing feathery foliage on slender stems. This leafy stage is when dill is most useful for cooking.
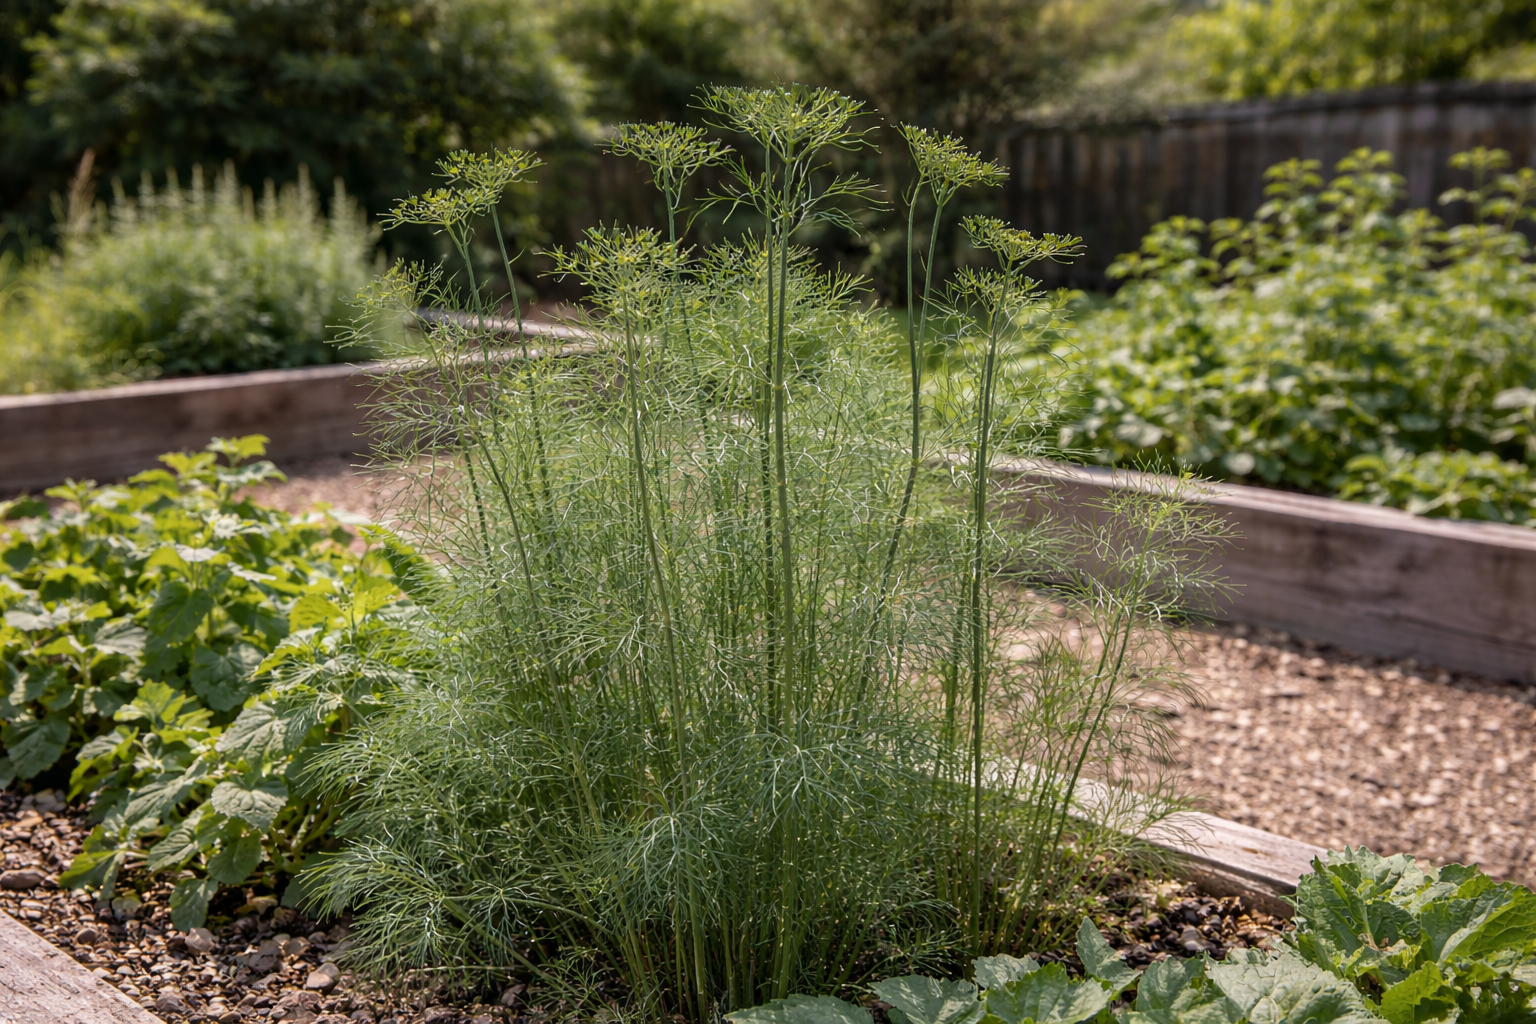
Bolting: As days lengthen and temperatures warm, dill shifts from leaf production to flowering. The plant sends up a tall central stalk topped with umbrella-shaped yellow flowers. Once bolting begins, leaf production essentially stops. The leaves that remain become coarser and less flavorful.
Flowering and seed set: Dill flowers attract beneficial insects, particularly parasitic wasps that prey on garden pests. After flowering, seeds develop in the umbrella-shaped seed heads. These seeds are the dill used in pickling spice and many cuisines.
The Santa Cruz timing challenge: Our mild winters mean dill can grow through seasons when it would die elsewhere. But our warming spring triggers bolting earlier than gardeners might expect. A dill plant started in March may bolt by May, giving you only weeks of leaf harvest. The same plant started in September grows through fall and winter, providing months of harvest before bolting the following spring. According to the UC Cooperative Extension, dill performs best in cool weather with temperatures between 60 and 70 degrees, and bolts rapidly once daytime highs regularly exceed 75 degrees.
This is why fall planting is so valuable here. While summer gardeners elsewhere are starting dill, Santa Cruz gardeners are harvesting from plants started the previous fall.
When Should You Plant Dill in Santa Cruz County?
Timing is the most important factor in dill success. Here are the best planting windows for Santa Cruz County.
Primary Planting Window: Fall (September through November)
Fall is the ideal time to start dill in Santa Cruz County. Cooling temperatures and shortening days keep plants in the vegetative (leafy) stage for months. Fall-planted dill grows through winter, providing harvests from late fall through early spring before finally bolting as days lengthen in March or April.
September plantings establish before the first rains and grow vigorously through fall. These plants are large and productive by winter.
October and November plantings grow more slowly as temperatures cool, but they still establish well. These later plantings extend your harvest window since they'll bolt slightly later in spring than September-planted dill.
Secondary Planting Window: Late Winter (February through Early March)
A late winter planting extends harvests into late spring. Plants started in February grow during cool weather and produce usable foliage before bolting in May or June.
This window is shorter and less reliable than fall planting. An early warm spell can trigger premature bolting. But it's worth trying, especially if you missed the fall window or want to extend your harvest.
Succession Planting
For continuous dill supply, plant every 3-4 weeks during the cool season. Start in September, continue through November, pause during the coldest weeks of December and January, then resume in February. This staggered approach ensures some plants are always in the leafy stage while others are bolting or setting seed.
Summer Planting: Mostly for Seeds
Dill planted in late spring or summer bolts almost immediately in Santa Cruz County. The long days and warm temperatures trigger flowering before plants develop much foliage. If you want dill seeds for pickling or saving, summer planting works fine. For leaf harvest, stick to cool-season planting.
One exception: coastal gardens with heavy fog influence (parts of Aptos, Capitola, Santa Cruz) may succeed with late spring dill since fog keeps temperatures cool enough to delay bolting. It's worth experimenting if you have a particularly cool, foggy microclimate.
How Should You Choose Dill Varieties?
Dill varieties differ primarily in their bolting speed and leaf-to-seed ratio. Choose based on your priorities.
Slow-Bolt Varieties (Best for Leaf Harvest)
Bouquet is the most commonly available dill and a reliable performer. It's reasonably slow to bolt and produces abundant foliage. If you can only find one variety at your local nursery, it's probably Bouquet, and that's fine.
Dukat (also sold as Tetra Dill) is specifically selected for leaf production. It's slower to bolt than Bouquet and has a sweeter, less bitter flavor that some cooks prefer. The leaves are larger and more abundant. This is an excellent choice for Santa Cruz County gardeners focused on culinary use.
Fernleaf is a compact, slow-bolt variety that works well in containers. Plants reach only 18 inches tall (compared to 3-4 feet for standard dill), making them suitable for small spaces and pots. Despite the compact size, leaf production is good. Fernleaf won an All-America Selections award for its garden performance.
Hercules is another slow-bolt selection with vigorous growth and heavy leaf production. Less commonly available than Bouquet or Dukat, but worth seeking out.
Standard Varieties (Dual-Purpose)
Long Island Mammoth is an old standard variety that grows tall (4-5 feet) and produces both leaves and abundant seeds. It bolts faster than slow-bolt varieties but remains useful for gardeners who want both foliage and seeds.
Common Dill or generic "dill" without a variety name is typically similar to Long Island Mammoth. Performance varies by seed source.
Seed Production Varieties
If your primary goal is dill seed for pickling, any variety works. Fast-bolting types actually reach seed stage sooner. The seeds are similar regardless of variety.
For most Santa Cruz County gardeners, Dukat or Fernleaf are the best choices because maximizing leaf harvest before inevitable bolting is usually the goal. If you can't find these, Bouquet performs well.
How Should You Plant Dill?
Dill is best direct-sown rather than transplanted. Its long taproot resents disturbance, and transplants often bolt prematurely due to root stress. Here's how to plant successfully.
Direct Sowing (Recommended)
Prepare the planting area by loosening soil to about 6 inches deep. Dill isn't fussy about soil but appreciates decent drainage. Work in a light amount of compost if your soil is very poor, but avoid heavy amendments. Dill doesn't need rich soil.
Sow seeds shallowly. Scatter seeds on the soil surface and barely cover with soil (1/4 inch at most). Dill seeds need some light to germinate, so don't bury them deeply.
Keep soil consistently moist until germination, which takes 7-14 days. In fall, this may mean daily light watering since our dry season extends into October. Once seedlings emerge, reduce watering to every few days as plants establish.
Thin seedlings to 6-12 inches apart when they're a few inches tall. Crowded dill produces weak, spindly plants. Use thinnings in the kitchen.
Successive sowings every 3-4 weeks extend the harvest. Mark your calendar to remind yourself.
Transplanting (If Necessary)
If you must start dill indoors or buy transplants, handle carefully to minimize root disturbance. Use biodegradable pots (peat pots, cow pots) that can be planted directly without removing the seedling. Transplant when seedlings have only 2-3 sets of true leaves; older transplants suffer more root stress.
Even with careful handling, transplanted dill often bolts earlier than direct-sown plants. Accept this limitation if transplanting is your only option.
Container Growing
Dill grows reasonably well in containers, making it an option for small-space gardens and patios.
Container size matters. Dill's taproot needs depth. Use containers at least 12 inches deep, preferably deeper. Wide pots (12+ inches diameter) allow multiple plants or successive sowings in the same container.
Choose compact varieties like Fernleaf for containers. Standard dill varieties grow 3-4 feet tall and may become top-heavy in pots.
Provide support if growing tall varieties in containers. A simple stake prevents plants from toppling in wind.
Water consistently. Container dill dries out faster than in-ground plants, especially as plants mature.
Site Selection
Full sun to partial shade: Dill grows best in full sun (6+ hours) but tolerates partial shade. In fact, afternoon shade may slightly delay bolting in late spring, extending your harvest.
Shelter from wind: Dill's tall, slender stems topple easily in wind. Plant in a protected location or provide staking.
Near the kitchen: Dill is most useful when convenient to harvest. A spot near your back door encourages frequent picking.
How Do You Care for Dill?
Once established, dill requires minimal care. Here's how to keep plants healthy and productive.
Watering
Keep soil consistently moist but not waterlogged. Dill evolved in Mediterranean regions and tolerates some drought once established, but consistent moisture produces the best foliage.
During germination and early growth, water frequently enough to keep the top inch of soil moist.
As plants mature, deep watering once or twice weekly is usually sufficient. Dill's taproot accesses moisture from deeper soil layers.
During our rainy winter months, supplemental watering is rarely needed for in-ground dill. Container plants may still need occasional watering if rains are insufficient.
Fertilizing
Dill needs little fertilizer. Heavy feeding encourages rapid growth that may actually speed bolting.
At planting, a light application of balanced organic fertilizer is sufficient for the entire growing season.
Don't fertilize after plants are established unless they show signs of nutrient deficiency (yellowing leaves, stunted growth). Even then, use a light hand.
Supporting Tall Plants
Standard dill varieties reach 3-4 feet tall on slender stems that topple easily. In windy locations (and much of Santa Cruz County is windy), provide support.
Stakes: Place a stake near each plant or group of plants. Tie stems loosely to stakes as they grow.
Plant support rings: These circular wire supports keep multiple stems upright without individual staking.
Dense plantings: Dill plants grown close together support each other somewhat. This works for small plantings but may increase disease pressure in very dense stands.
Fernleaf and other compact varieties rarely need staking, making them lower-maintenance choices.
Managing Bolting
You can't prevent bolting entirely, but you can delay it.
Plant at the right time. Fall planting gives the longest harvest window before spring bolting.
Choose slow-bolt varieties. Dukat, Fernleaf, and other slow-bolt selections buy you extra weeks of harvest.
Harvest frequently. Regular cutting may modestly delay bolting by removing stem tips that would otherwise flower.
Provide afternoon shade. In late spring, shade from the hot afternoon sun may slightly delay bolting.
Accept the inevitable. Eventually, all dill bolts. When it does, let some plants flower for beneficial insects and seed production, while pulling others to make room for new crops.
What to Do When Dill Bolts
Once the central flower stalk appears, your leaf harvest is essentially over. But bolting dill is still useful.
Harvest remaining leaves immediately. They're still usable, though less tender than earlier harvests.
Let flowers mature to attract beneficial insects. Dill flowers are excellent for parasitic wasps, lacewings, ladybugs, and other beneficial insects, as noted by UC IPM Natural Enemies resources. A few bolting dill plants significantly boost your garden's pest-fighting population.
Harvest green seeds (before they dry) for pickles. Fresh dill seeds have more complex flavor than dried seeds.
Collect dry seeds for next year's planting or culinary use. Allow seed heads to dry on the plant until seeds are brown and loose. Cut heads and shake seeds into a paper bag.
Allow some self-sowing. Dill self-seeds readily. If you leave some seed heads in place, volunteer dill appears next season. These volunteers often germinate at ideal times for your microclimate.
When Should You Harvest Dill?
Knowing when and how to harvest ensures the best flavor and longest harvest period.
Harvesting Leaves (Dill Weed)
Begin harvesting when plants have several sets of mature foliage, typically 6-8 weeks after sowing. Don't wait until plants are huge; young dill has the finest texture and best flavor.
Harvest in the morning after dew dries but before midday heat. Essential oils are most concentrated in the morning.
Cut stems rather than individual leaves. Use scissors to snip 4-6 inch stem tips. This encourages branching and bushier growth.
Take from multiple plants rather than stripping one plant completely. Leave at least two-thirds of each plant's foliage for continued growth.
Harvest frequently. Regular cutting keeps plants productive and may modestly delay bolting.
Harvesting Seeds (Dill Seed)
For fresh green seeds (used in pickling), harvest seed heads when seeds have formed but are still green and pliable, usually 2-3 weeks after flowering.
For dry seeds (for spice or saving), wait until seed heads turn brown and seeds are fully mature. This takes 4-6 weeks after flowering. Seeds should be dry and loose in the seed head.
To harvest dry seeds, cut seed heads and place upside down in a paper bag. Shake to release seeds. Alternatively, hang seed heads over a tray or cloth to catch falling seeds.
Store dry seeds in airtight containers in a cool, dark place. They remain viable for planting for 3-5 years and keep good culinary flavor for 1-2 years.
Harvesting Flowers
Dill flowers are edible and make attractive garnishes. Their flavor is similar to leaves but with a slightly stronger anise note. Harvest flower heads just as they open for garnishing dishes, flavoring vinegars, or adding to pickles.
How Can You Preserve Dill?
Fresh dill is best used immediately, but several preservation methods extend the harvest.
Freezing (Best for Flavor)
Freezing preserves dill's fresh flavor better than drying.
Flash freeze method: Spread clean, dry dill fronds on a baking sheet and freeze until solid. Transfer to freezer bags, pressing out air. Use directly from frozen in cooking without thawing.
Ice cube method: Chop dill and pack into ice cube trays. Cover with water and freeze. Pop out cubes and store in freezer bags. Drop cubes directly into soups, sauces, and cooking liquids.
Oil cubes: Pack chopped dill into ice cube trays and cover with olive oil. Freeze, then transfer to freezer bags. Use for sautéing or dressings.
Frozen dill retains good flavor for 4-6 months.
Drying (Convenient but Less Flavorful)
Drying is convenient but sacrifices much of dill's delicate flavor. Dried dill works in cooked dishes but lacks the brightness of fresh or frozen.
Air dry by bundling stems and hanging upside down in a warm, dry, dark place. Dill dries in 1-2 weeks. Our dry Santa Cruz summers make air drying easy.
Dehydrator drying produces faster, more consistent results. Use the lowest temperature setting (95-105°F) and dry until fronds crumble easily.
Store dried dill in airtight containers away from light. Use within 6 months for best flavor.
Dill Vinegar
Infusing vinegar with dill preserves the herb's flavor for use in dressings and marinades.
Pack fresh dill fronds (and optionally flowers and green seeds) into a clean jar. Cover with white wine vinegar, rice vinegar, or apple cider vinegar. Let steep for 2-4 weeks at room temperature, shaking occasionally. Strain and store. Dill vinegar keeps indefinitely at room temperature.
Dill Salt
Dill salt makes a flavorful seasoning for fish, vegetables, and eggs.
Mix 1 cup coarse salt with 1/2 cup finely chopped fresh dill. Spread on a baking sheet and let dry at room temperature for several days, or dry in a low oven (200°F) for a few hours. Store in an airtight container.
What Are the Best Companion Plants for Dill?
Dill affects nearby plants in both positive and negative ways. Plant it thoughtfully.
Good Companions
Brassicas (cabbage, broccoli, kale, Brussels sprouts) benefit from dill's ability to attract beneficial insects that prey on cabbage pests. Parasitic wasps attracted to dill flowers attack cabbage worms and other brassica pests.
Lettuce and other salad greens grow well near dill, sharing similar cool-season timing and water needs.
Cucumbers are traditional companions, partly because dill and cucumbers end up together in pickles anyway. Dill's beneficial insects help cucumber pest control.
Onions and garlic tolerate dill nearby without issues.
Problematic Companions
Carrots are closely related to dill (both are in the carrot family, Apiaceae) and may cross-pollinate if both flower simultaneously. More importantly, they may compete for similar soil space since both have taproots. Keep them separated.
Fennel should never be planted near dill. They cross-pollinate readily, producing offspring with poor flavor. Fennel also inhibits growth of many nearby plants through chemical compounds it releases, a phenomenon documented by UC Integrated Pest Management.
Tomatoes have a complicated relationship with dill. Young dill may benefit tomatoes by attracting beneficial insects. But mature, flowering dill may actually inhibit tomato growth. If you grow dill near tomatoes, remove dill plants when they begin to bolt.
Cilantro is another carrot-family herb that may cross-pollinate with dill. Keep them apart if you plan to save seeds.
How Do You Grow Dill in Different Santa Cruz Microclimates?
Dill adapts well throughout Santa Cruz County with timing adjustments for local conditions.
Coastal gardens (Aptos, Capitola, Santa Cruz, Live Oak): Your cool, foggy conditions are excellent for dill. The moderating fog influence may even allow spring or early summer plantings that would fail inland. Fall planting remains ideal, but you have more flexibility than inland gardeners. Your main challenge is ensuring enough sun; dill needs at least 6 hours for best growth.
San Lorenzo Valley (Boulder Creek, Ben Lomond): Fall and winter dill performs well in sunny exposures. Your cooler temperatures extend the harvest season before spring bolting. However, the coldest winter nights may slow growth significantly. In heavy frost periods, consider row cover for protection (dill survives light frost but not hard freezes).
Under the redwoods (Felton, Ben Lomond canyons): Shade is your challenge. Dill needs sun, and deep redwood shade won't work. If you have sunny openings or clearings, dill grows well there. The naturally cool conditions are otherwise ideal. Consider container growing on a sunny deck if your garden is too shaded.
Inland valleys (Scotts Valley, Soquel hills): Good dill-growing conditions with standard fall planting timing. Your warmer spring means bolting comes earlier than at the coast, so plant in early fall for the longest harvest window.
Pajaro Valley (Watsonville): Your warm, sunny conditions produce vigorous dill growth but also trigger earlier bolting. Plant in September for fall and winter harvest. Spring-planted dill bolts very quickly here. Afternoon shade helps extend the harvest period in late winter and early spring.
Where Can You Buy Dill Seeds and Plants Locally?
Dill seeds are widely available; plants less so since dill transplants poorly.
Renee's Garden Seeds (based right here in Felton) offers Bouquet and sometimes specialty dill varieties. Their seeds are fresh and germinate reliably. Find them at local nurseries or order online at reneesgarden.com.
San Lorenzo Garden Center (235 River Street, Santa Cruz) carries seeds and sometimes transplants. For transplants, buy the smallest plants available and transplant carefully to minimize root disturbance.
Mountain Feed & Farm Supply (9550 Highway 9, Ben Lomond) stocks seeds and gardening supplies. A good resource for San Lorenzo Valley gardeners.
Peaceful Valley Farm Supply (groworganic.com) offers multiple dill varieties including slow-bolt selections. They ship to Santa Cruz County.
For best variety selection, order seeds online from companies like Baker Creek, Johnny's Selected Seeds, or Kitazawa Seed Company. Seeds ship easily and remain viable for several years.
Farmers markets occasionally have dill transplants from local herb growers. Handle carefully if buying transplants.
Frequently Asked Questions About Growing Dill in Santa Cruz
Why does my dill bolt so quickly?
Dill bolts in response to long days and warm temperatures. If you planted in spring, warming weather triggered flowering before you could harvest much foliage. The solution is fall planting: start dill in September through November when days are shortening and temperatures are cooling. Fall-planted dill grows through winter and provides months of harvest before bolting in spring. Also choose slow-bolt varieties like Dukat or Fernleaf.
Can I grow dill in summer in Santa Cruz?
Summer dill planting is mostly unsuccessful for leaf harvest. Long days and warm temperatures trigger immediate bolting. However, coastal gardens with strong fog influence may succeed with late spring plantings since fog keeps temperatures cool. Summer planting works fine if your goal is dill seed rather than leaves. Consider it an experiment: try a small planting and see how your specific microclimate responds.
Should I let dill self-seed?
Yes, if you have space. Dill self-seeds readily, and volunteer plants often appear at ideal times for your specific microclimate. Let some plants go to seed and drop naturally. Pull volunteers that appear in inconvenient locations, but keep those that sprout where you want them. Over time, you may develop a self-sustaining dill population with minimal effort.
Can I grow dill in a container?
Yes, with attention to container depth. Dill's taproot needs at least 12 inches of soil depth to develop properly. Compact varieties like Fernleaf work best in containers. Provide consistent moisture since containers dry out faster than garden beds. Place containers in full sun for best growth, with some afternoon shade in late spring to delay bolting.
How do I keep dill from falling over?
Dill's tall, slender stems topple easily, especially in Santa Cruz County's windy conditions. Choose compact varieties like Fernleaf that stay under 2 feet tall. For taller varieties, provide stakes or plant support rings. Dense plantings allow plants to support each other somewhat. Avoid over-fertilizing, which encourages weak, floppy growth.
What's the difference between dill weed and dill seed?
Dill weed refers to the feathery leaves and stems, used fresh or dried in cooking. Dill seed is the dried seed, used in pickling spice and many cuisines. Both come from the same plant but at different stages. Dill weed has a lighter, fresher flavor; dill seed is more concentrated and pungent. They're not interchangeable in recipes. Grow dill for leaves (cool season, harvest before flowering) or seeds (allow to flower and mature) depending on your needs.
Why are my dill seedlings so thin and weak?
The most common cause is insufficient light. Dill needs full sun (6+ hours) for sturdy growth. In too much shade, seedlings stretch toward light and remain weak. Overcrowding also causes spindly growth; thin seedlings to 6-12 inches apart. Finally, overwatering can weaken seedlings. Keep soil moist but not waterlogged.
Can I transplant dill?
Dill can be transplanted but resents root disturbance. Its long taproot doesn't recover well from damage. If you must transplant, use small seedlings (2-3 sets of true leaves), handle root balls carefully, and plant in biodegradable pots that go directly into the ground. Direct sowing is much more reliable and produces healthier plants.
Will dill come back next year?
Dill is an annual that dies after setting seed. However, it self-seeds prolifically, so volunteer plants often appear the following season. These volunteers grow from seeds dropped by last year's plants. If you allow some dill to go to seed, you'll likely have dill in roughly the same location next year without replanting.
Free Gardening Resources
Getting Started
Beginner Garden Setup Checklist – Complete setup guide to start your garden right.
Know Your Microclimate Worksheet – Understand your local conditions before planting.
Planning & Timing
Seasonal Planting Calendar – Avoid timing mistakes with month-by-month guidance.
Vegetables by Season Chart – Quick reference for what to plant and when in Santa Cruz County.
Seasonal Garden Tasks Checklist – Stay on track with monthly garden maintenance tasks.
Growing Guides
Companion Planting Guide – Learn which plants grow better together and which to keep apart.
Tomato Variety Selector – Find the best tomato varieties for your Santa Cruz microclimate.
Problem Solving
Garden Troubleshooting Guide – Diagnose common problems before they become disasters.
Gopher Control Guide – Humane and effective strategies for managing gophers in your garden.
Santa Cruz-Specific Guides
Water-Wise Gardening Guide – Conserve water while keeping your garden thriving through dry seasons.
Embrace Cool-Season Dill Growing
Dill rewards Santa Cruz County gardeners who work with its preferences rather than against them. Our mild fall, winter, and early spring create ideal dill-growing conditions that gardeners in harsh climates can only dream of. While they struggle to grow dill in a brief summer window, we can harvest fresh dill for six months or more.
Start your first fall planting in September. Scatter seeds in a sunny spot, keep them moist until germination, and watch feathery fronds emerge as the weather cools. By November, you'll be harvesting fresh dill for potato salads and salmon. By February, you'll still be harvesting while your plants prepare for their spring flowering finale.
When bolting finally arrives, let some plants flower for the beneficial insects that will help your entire garden. Collect seeds for pickles and next year's planting. Then start the cycle again in September, maybe with a slow-bolt variety this time for even longer harvests.
Fresh dill, just steps from your kitchen, transforms everyday cooking. Those grocery store bundles of wilted dill will never taste the same once you've experienced the real thing.
Related Articles
Herb Growing Guides
Growing Herbs in Santa Cruz County - Complete guide to growing culinary herbs
Growing Basil in Santa Cruz - Tips for our most popular summer herb
Growing Rosemary in Santa Cruz - The easiest Mediterranean herb
Growing Lavender in Santa Cruz - Fragrant, drought-tolerant beauty
Growing Mint in Santa Cruz - Vigorous grower for mojitos and more
Growing Thyme in Santa Cruz - Versatile culinary and cocktail herb
Growing Oregano in Santa Cruz - Mediterranean kitchen essential
Growing Sage in Santa Cruz - Savory herb for cooking and cocktails
Growing Parsley in Santa Cruz - The underrated two-year herb
Growing Cilantro in Santa Cruz - Cool-season favorite
Growing Dill in Santa Cruz - Quick-growing annual herb
Growing Chives in Santa Cruz - Easy perennial onion flavor
Herb Care & Preservation
Preventing Basil from Bolting - Keep basil productive all season
Preserving Fresh Herbs - Drying, freezing, and infusing methods
Special Topics
Growing Herbs for Cocktails - From garden to glass
Fire-Wise Herb Gardens - Low-growing, high-moisture plants for defensible space