

Planting Bare-Root Strawberries: A Santa Cruz Guide
A few of the product links in this guide are affiliate links. If you buy through one, Ambitious Harvest may earn a small commission at no extra cost to you, which helps keep these guides free. We only point to gear we would use in our own Santa Cruz garden. As an Amazon Associate, we earn from Read our full disclosure.
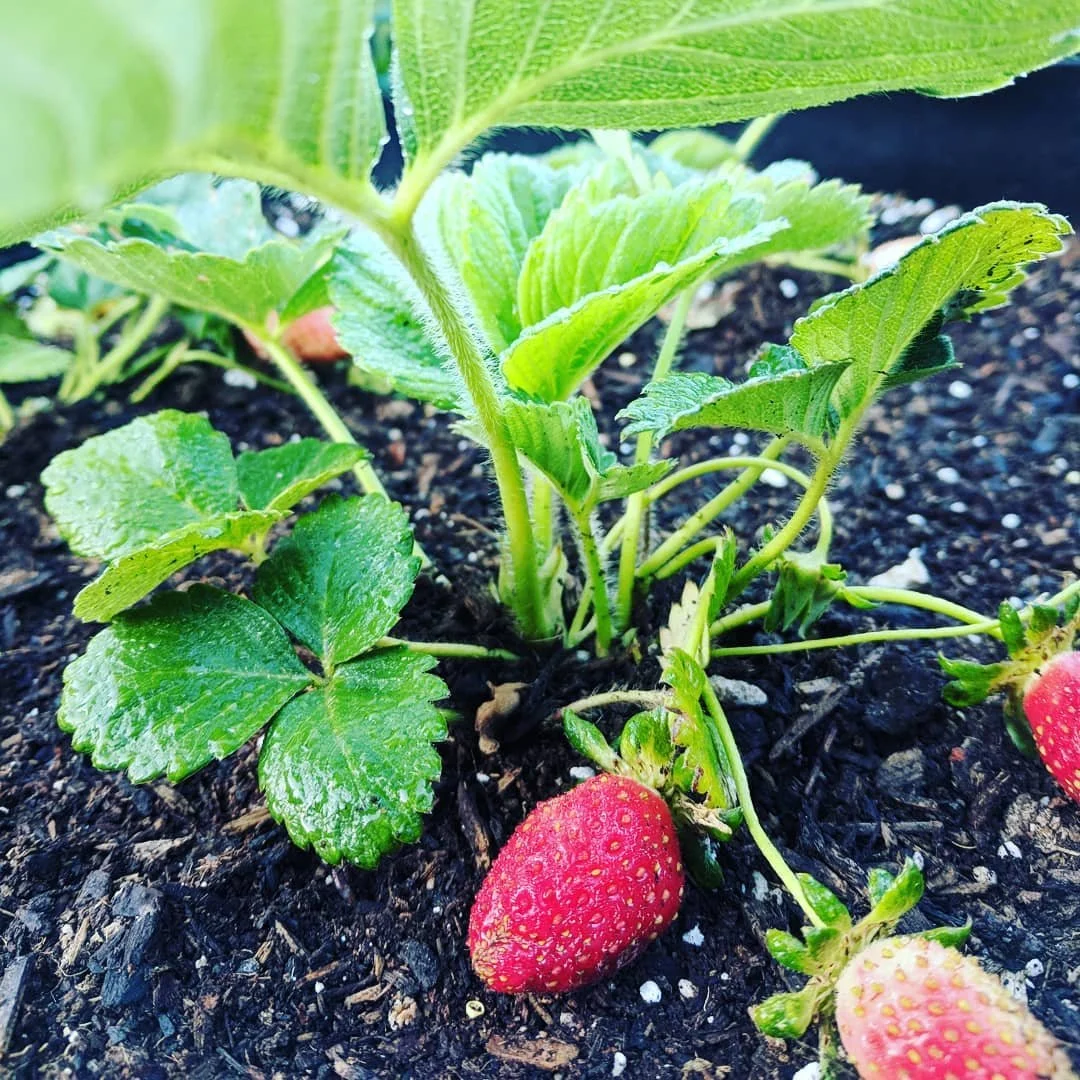
Bare-root strawberries are dormant plants sold without soil around their roots. They look like a bundle of dead roots with a small crown on top, and first-time buyers often wonder if they've made a terrible mistake. Don't worry. Those unpromising-looking roots will grow into productive strawberry plants within weeks of planting.
This guide covers everything you need to know about planting bare-root strawberries in Santa Cruz County.
Why Should You Choose Bare-Root Strawberries?
Cost Savings
Bare-root strawberries cost significantly less than potted plants, typically $1 to $3 per plant versus $4 to $8 for container-grown. If you're planting 25 or more strawberries (which isn't many for a productive patch), the savings add up quickly.
Variety Selection
Local nurseries carry maybe a handful of strawberry varieties in pots. Mail-order bare-root suppliers offer dozens, including many UC varieties bred specifically for California conditions. If you want to try Sequoia, San Andreas, or Mara des Bois, bare-root is often your only option.
Better Establishment
According to UC ANR's bare-root planting guide, bare-root plants often establish faster than container plants because their roots grow directly into your garden soil rather than circling in a pot. There's no transplant shock from root disturbance.
Timing Control
Bare-root season (typically January through March locally) aligns perfectly with the best planting windows for many Santa Cruz County microclimates.
When Are Bare-Root Strawberries Available?
| Your Location | Best Planting Time | Expected First Harvest | Tips |
|---|---|---|---|
| Coastal Aptos, Capitola, Santa Cruz, Live Oak | December – February Peak: January–February | Late winter to spring (Feb–April) Day-neutral varieties can fruit within 8-12 weeks of planting | Mild winters mean no frost protection needed. Plants establish roots over winter and produce heavily by spring. |
| San Lorenzo Valley Boulder Creek, Ben Lomond, Felton | Late Feb – March After hardest frosts pass | Late spring to early summer Fall planting possible with heavy mulch protection | Wait until frost danger decreases. If fall planting, mulch heavily and protect crowns. Sunny spots warm up faster. |
| Inland Valleys Scotts Valley, Soquel hills | January – March Flexible timing | Spring (April–May) Moderate conditions allow steady establishment | You have flexibility. Earlier planting (Jan–Feb) means earlier harvest. Watch for soggy soil during rainy spells. |
| Pajaro Valley Watsonville, Freedom | December – February Fall planting also excellent (Oct–Nov) | Late winter to spring (Feb–April) Warmest zone = earliest production | Warm soil means fast establishment. This is strawberry country, and conditions match commercial fields. You can also plant in fall. |
Where to Buy Bare-Root Strawberries
In Santa Cruz County, look for bare-root strawberries:
At local nurseries: January through early March (peak availability in February)
From mail-order suppliers: Ships based on your climate; typically arrives January through March for California
The bare-root window is limited. Nurseries stock these plants for just a few weeks, and they sell out fast. If you want specific varieties, call ahead or order early from mail-order suppliers.
Best Planting Times by Microclimate
Coastal areas (Aptos, Capitola, Santa Cruz): Plant bare-root December through February for spring establishment
San Lorenzo Valley: Plant late February through March after hardest frosts
Inland valleys (Scotts Valley): January through March, avoiding soggy soil periods
Pajaro Valley (Watsonville): December through February
See our main strawberry guide for detailed timing information.
What Should You Look for When Buying?
Signs of Healthy Bare-Root Plants
Firm, tan to light brown roots (not black, mushy, or dried out)
Plump crown (the central growing point should look alive, not shriveled)
Some small leaf buds or tiny leaves emerging from the crown
No mold on roots or crown
Moist but not soggy packaging
Red Flags to Avoid
Dried, brittle roots (plants have been stored too long)
Black, mushy roots (rot has set in)
Moldy crowns
Roots that smell bad
Crowns that are soft or squishy
If you're buying in person, open the package and examine the plants before purchasing. Reputable nurseries expect this.
How Should You Prepare Bare-Root Strawberries for Planting?
1
Inspect Plants on Arrival
|
2
Soak the Roots
⚠️ Don't skip this step! Rehydrating roots dramatically improves establishment.
|
3
Prepare the Planting Site
|
4
Dig Holes and Position Plants
⚠️ Most important step! Crown at soil level is critical. Too deep = crown rot. Too shallow = dried roots. Check and double-check.
|
5
Fill, Firm, and Water
|
6
Mulch
✓ Success tip: Straw is traditional (hence "strawberry"), but pine needles work well and are often free in Santa Cruz County!
|
7
First-Week Care
|
8
First-Month Care
✓ Success tip: Removing early flowers feels painful, but plants that establish strong roots before fruiting produce more berries overall.
|
Step 1: Inspect the Plants
Remove plants from packaging as soon as you get home. Check roots and crowns for damage or mold. Trim off any blackened or mushy roots with clean scissors.
Step 2: Soak the Roots
Place roots in a bucket of room-temperature water for 1 to 2 hours before planting. According to UC ANR, this rehydrates the plants and helps them recover from storage. Don't soak longer than 24 hours, as roots can become waterlogged.
Pro tip: Add a splash of kelp emulsion or diluted fish fertilizer to the soaking water for a gentle nutrient boost.
Step 3: Trim Damaged Roots
While plants are soaking, prepare your planting area. Just before planting, trim any roots longer than 6 to 8 inches. This encourages new root growth and makes planting easier.
How Should You Prepare Your Planting Site?
Site Selection
Choose a location with:
Full sun (6+ hours of direct sunlight)
Good drainage (strawberries hate wet feet)
Protection from strong wind (coastal gardeners, take note)
No recent strawberry, tomato, pepper, or eggplant crops (these share diseases)
Soil Preparation
Strawberries prefer slightly acidic soil (pH 5.5 to 6.5) rich in organic matter. Prepare your bed by:
Loosening soil to at least 8 to 10 inches deep
Adding 2 to 4 inches of compost and working it into the soil
Ensuring drainage by building raised beds or mounds if your soil stays wet
If planting in heavy clay (common in parts of Santa Cruz County), raised beds at least 8 to 12 inches tall are strongly recommended.
When and How Should You Plant Step by Step?
Step 1: Dig the Hole
Make a hole wide enough to spread roots without crowding and deep enough that the crown will sit at exactly soil level. A trowel works well; create a small mound of soil in the center of each hole to spread roots over.
Step 2: Position the Plant
This is the most critical step. The crown must be exactly at soil level.
Too deep: The crown will rot
Too shallow: Roots will dry out and plants will die
Spread roots evenly over the soil mound, arranging them to point downward and outward. The crown (where roots meet stem) should sit right at the soil surface.
Step 3: Fill and Firm
Fill the hole with soil, working it gently around the roots to eliminate air pockets. Firm the soil with your hands (don't stomp), leaving the crown exposed and at soil level.
Step 4: Water Thoroughly
Water immediately after planting, soaking the soil around each plant. This settles soil around roots and provides essential moisture for establishment.
Step 5: Mulch
Apply 2 to 3 inches of organic mulch (straw is traditional) around plants, keeping mulch away from the crown itself. Mulch conserves moisture, suppresses weeds, and keeps future berries clean.
What Are the Right Spacing Guidelines?
In-ground beds: 12 to 18 inches between plants, 3 to 4 feet between rows
Raised beds: 12 inches between plants in all directions
Containers: One plant per 12-inch pot, or 3 to 4 plants in a strawberry jar
Closer spacing means more plants (and potentially more berries) but increased disease pressure from reduced air circulation. In Santa Cruz County's humid coastal areas, err on the side of wider spacing.
How Should You Care for Plants in the First Year?
Watering
Keep soil consistently moist (not waterlogged) for the first few weeks as roots establish. After plants show new growth, water when the top inch of soil dries out.
First month: Water every 2 to 3 days, more often in warm weather
Established plants: Water deeply once or twice per week, adjusting for rainfall
Check the current conditions on our Garden Conditions Dashboard to help time your watering.
Removing First Flowers (Optional but Recommended)
Many experts recommend removing flowers for the first 4 to 6 weeks after planting bare-root strawberries. This redirects energy from fruit production to root establishment, resulting in stronger plants and better harvests later.
This feels painful (you want berries!), but plants that establish good roots before fruiting produce more berries overall.
Exception: If you plant in fall for spring harvest, you don't need to remove flowers in spring since plants have had months to establish.
Managing Runners
Strawberry plants send out runners (horizontal stems) that root and form new plants. In the first year, remove runners to keep plants focused on establishing themselves and producing fruit.
In subsequent years, you can allow some runners to root as replacements for aging plants.
Fertilizing
Don't fertilize immediately after planting. Wait until you see active new growth (usually 2 to 4 weeks), then feed lightly with a balanced fertilizer or compost tea.
Avoid high-nitrogen fertilizers, which produce lots of leaves but few berries.
What Are the Most Common Bare-Root Planting Mistakes?
Planting Too Deep
The crown rotting because it's buried is the most common cause of bare-root strawberry failure. Check and re-check crown position before firming soil.
Letting Roots Dry Out
Bare roots die quickly when exposed to air. Keep plants in water or wrapped in damp newspaper until the moment you plant each one.
Not Soaking Before Planting
Skipping the pre-soak forces stressed, dehydrated plants to establish in dry conditions. Take the time to rehydrate roots.
Planting in Soggy Soil
If your soil is waterlogged from winter rains, wait until it drains or plant in raised beds. Strawberry roots rot in standing water.
Overcrowding
Tight spacing seems efficient but leads to disease problems and smaller berries. Give plants room to breathe.
What If Your Plants Don't Look Good?
Plants Arrive Dried Out
If roots are dry and brittle, soak them for several hours (up to 12 to 24 hours) in room-temperature water. Many will recover.
Plants Arrive Moldy
Trim off any moldy portions. If mold has reached the crown, the plant may not survive, but it's worth trying if roots are otherwise healthy.
Plants Don't Wake Up
After planting, most bare-root strawberries show new leaf growth within 2 to 4 weeks. If a plant shows no signs of life after 4 to 6 weeks while others are growing, it probably didn't survive. Replace it.
Leaves Emerge Then Wilt
This usually indicates crown rot (planted too deep) or root damage. Dig up the plant and examine the crown and roots. If the crown is soft or roots are black, the plant won't recover.
Where Can You Buy Bare-Root Strawberries?
Local Nurseries (Limited Selection, No Shipping)
San Lorenzo Garden Center carries seasonal bare-root berries
Mountain Feed & Farm Supply in Ben Lomond
Check local independent nurseries in January and February
Mail Order (Best Selection)
Lassen Canyon Nursery specializes in strawberry varieties for California
Peaceful Valley Farm Supply offers certified organic bare-root plants
Raintree Nursery carries diverse varieties
Order early. Popular varieties sell out by December or January.
Frequently Asked Questions
When should I plant bare-root strawberries in Santa Cruz County?
Coastal areas: December through February. San Lorenzo Valley and inland: Late February through March after frost danger decreases. See our main strawberry guide for detailed timing.
How long can I store bare-root strawberries before planting?
Not long. Plant within a few days of receiving them. If you must delay, keep roots moist (wrapped in damp newspaper) and store in a cool location. Don't let them dry out.
Should I fertilize at planting time?
No. Wait until you see active new growth (2 to 4 weeks), then feed lightly. Fertilizing stressed, newly planted roots can cause damage.
How deep should I plant bare-root strawberries?
Crown exactly at soil level. This is the most critical factor for success. Too deep and the crown rots; too shallow and roots dry out.
Why do my bare-root strawberries look dead?
They're dormant, not dead. Bare-root plants look like bundles of dead roots because they're not actively growing. They'll wake up after planting if the roots are firm and the crown is healthy.
Can I plant bare-root strawberries in containers?
Yes. Use containers at least 12 inches deep with good drainage. Potting soil (not garden soil) works best. One plant per 12-inch pot.
How soon will bare-root strawberries produce fruit?
Day-neutral varieties planted in late winter may produce some berries by late spring or early summer of the first year. June-bearing varieties typically don't produce a full crop until the second year.
Should I remove flowers the first year?
It helps establish stronger plants with better long-term production, but it's not required. At minimum, remove flowers for the first 4 to 6 weeks after planting.
Free Gardening Resources
Find all our free guides in Your Garden Toolkit.
More Strawberry Growing Guides
Part of our Complete Strawberry Series for Santa Cruz County:
Growing Strawberries in Santa Cruz County: A Local Guide to Sweet Success - Everything you need to know about growing strawberries in our coastal climate
Best Strawberry Varieties for Santa Cruz County - Which varieties thrive here and where to find them locally
Growing Strawberries: In the Ground vs. Raised Beds vs. Containers - Compare your planting options and find the best fit for your space
Understanding Strawberry Growth Stages in Your Santa Cruz Garden - What to expect from dormancy through harvest
How to Multiply Strawberries from Runners (Free Plants Forever) - Propagate new plants from runners for an ever-expanding patch
Top Strawberry Mistakes New Gardeners Make (And How to Avoid Them) - Common pitfalls and how to sidestep them
Strawberry Troubleshooting Guide - Identify and solve pests, diseases, and growing problems
Reviving Your Strawberry Patch After Harsh Weather - Recovery strategies for storm or heat-damaged plants