

Understanding Strawberry Growth Stages in Your Santa Cruz Garden
A few of the product links in this guide are affiliate links. If you buy through one, Ambitious Harvest may earn a small commission at no extra cost to you, which helps keep these guides free. We only point to gear we would use in our own Santa Cruz garden. As an Amazon Associate, we earn from Read our full disclosure.
Every strawberry plant moves through predictable growth stages, from dormant crown to fruit-laden producer. Understanding these stages helps you provide the right care at the right time and recognize when something's off. This guide walks you through the complete strawberry life cycle as it unfolds in Santa Cruz County gardens.
Why Do Strawberry Growth Stages Matter?
Knowing what your strawberry plants should be doing (and when) takes the guesswork out of care. You'll know when to fertilize, when to hold back water, when flowers are normal versus concerning, and when fruit production signals a healthy plant versus an aging one.
Each stage has specific needs. Give your plants what they need at each phase, and they'll reward you with abundant harvests.
According to UC Agriculture and Natural Resources, understanding the strawberry production cycle helps home gardeners provide the right care at each stage, from dormancy through harvest and runner management.
| Stage | Timing | What You'll See | Key Care Tasks |
|---|---|---|---|
| 1Dormancy | Dec - Feb | Plants look nearly dead. Few or no leaves. Crown intact but inactive. |
|
| 2Awakening | Feb - Mar | New leaves emerge from crown. Pale green at first, then darken. |
|
| 3Vegetative Growth | Mar - Apr | Rapid leaf production. Plant expands into full, rounded shape. |
|
| 4Flowering | Apr - May | White flowers with yellow centers on stalks above foliage. |
|
| 5Fruit Development | 2-4 weeks | Small green berries appear. Gradually enlarge over several weeks. |
|
| 6Ripening | 4-6 wks after bloom | Green to white to pink to red. Berries soften and develop aroma. |
|
| 7Runner Production | Late spring - fall | Long horizontal stems with plantlets at ends. Root on soil contact. |
|
| 8Fall Transition | Oct - Nov | Growth slows. Leaves may bronze. Runner and flower production stops. |
|
What Happens During Dormancy?
When it happens: December through early February (varies by microclimate)
What you'll see: Plants look nearly dead. Leaves may be sparse, brown-edged, or absent. The crown (center growing point) remains intact but shows no active growth. Roots are alive but inactive.
What's Actually Happening
During dormancy, strawberry plants conserve energy. Growth stops above ground, but roots remain viable, waiting for warming temperatures. This rest period is natural and necessary, especially for June-bearing varieties that require winter chill to trigger spring flowering.
In Santa Cruz County's mild climate, dormancy is often brief or partial. Coastal gardens may see plants retain some green leaves year-round. Inland and San Lorenzo Valley gardens experience more pronounced dormancy due to cooler temperatures.
Care During Dormancy
Water sparingly. Dormant plants need little water, but don't let roots dry out completely. In our rainy winters, natural rainfall is usually sufficient.
Don't fertilize. Plants can't use nutrients while dormant.
Mulch for protection. A layer of straw protects crowns from hard freezes, especially important in frost-prone areas.
Leave plants alone. Resist the urge to "clean up" too aggressively. Brown leaves provide some insulation.
Signs of Trouble
Crown feels mushy or pulls away easily (crown rot, likely fatal)
No green tissue visible anywhere, even when you gently scrape the crown
Roots are black and slimy when you dig up a test plant
What Does Spring Awakening Look Like?
When it happens: February through March (earlier on coast, later in San Lorenzo Valley)
What you'll see: New leaves emerge from the crown center. They're often pale green or yellowish at first, then darken. The crown visibly expands as growth resumes.
What's Actually Happening
As soil temperatures rise above 50°F and days lengthen, plants break dormancy. Stored energy in the crown fuels the first flush of new growth. Roots begin actively taking up water and nutrients.
This is when you discover which plants survived winter. Healthy crowns push out vigorous new growth. Damaged or dead crowns show nothing.
Care During Spring Awakening
Resume regular watering as new growth appears. Keep soil consistently moist but not waterlogged.
Clean up dead foliage. Now is the time to remove brown, dead leaves from winter. This improves air circulation and removes disease reservoirs.
Apply first fertilizer. Once you see active new growth (several new leaves emerging), feed with a balanced fertilizer or compost tea.
Check mulch levels. Replenish mulch if winter rains have compacted or displaced it.
Signs of Trouble
No new growth by late March (plant may have died; dig and check roots)
New leaves are severely distorted or discolored (possible virus or root damage)
Growth is extremely weak despite good conditions (plants may be too old; consider replacing)
What Happens During Vegetative Growth?
When it happens: March through April (overlaps with flowering for day-neutral varieties)
What you'll see: Rapid leaf production. Plants expand outward, producing multiple new leaves per week. The plant forms a full, rounded shape with overlapping leaf canopy.
What's Actually Happening
Plants are building the "solar panels" (leaves) needed to produce energy for flowering and fruiting. More leaves mean more photosynthesis, which means more energy for berry production. This stage is about building plant infrastructure.
Day-neutral varieties may simultaneously produce flowers during this stage. June-bearing varieties focus almost entirely on vegetative growth before their concentrated bloom period.
Care During Vegetative Growth
Water consistently. Growing leaves need steady moisture. Water stress now reduces the plant's capacity to produce fruit later.
Fertilize appropriately. A second light feeding mid-stage supports growth, but don't overdo nitrogen or you'll get all leaves and few flowers.
Watch for pests. Aphids love tender new growth. Scout regularly and address problems early.
Begin runner management. Runners may start appearing. Decide whether to remove them (focuses energy on fruit) or allow some to root (for propagation).
Signs of Trouble
Yellow leaves despite adequate water (nitrogen deficiency; feed with fish emulsion)
Curled or distorted new leaves (aphids or mites; inspect undersides)
Very slow growth (root problems, cold soil, or plants past their prime)
What Should You Expect During Flowering?
When it happens: April through May for June-bearing; intermittently spring through fall for day-neutral
What you'll see: White flowers with yellow centers emerge on stalks (trusses) rising above the foliage. Each flower has five petals surrounding a yellow cone of stamens.
What's Actually Happening
Flowers contain both male parts (stamens producing pollen) and female parts (pistils that become seeds and fruit). Each flower can potentially become one strawberry. The yellow cone in the center will develop into the fruit "flesh," with each tiny seed representing a successfully pollinated ovule.
Strawberry flowers are self-fertile but benefit from insect pollination. Wind, bees, and other pollinators help move pollen, resulting in better fruit set and larger, more symmetrical berries.
Care During Flowering
Protect from frost. Flowers are killed at temperatures below about 28°F. Cover plants on cold nights in frost-prone areas. Our coastal zones rarely have this problem, but San Lorenzo Valley gardeners should stay alert.
Encourage pollinators. Avoid pesticides during bloom. Plant pollinator-attracting flowers nearby. See our Pollinator-Friendly Gardens Guide.
Water at soil level. Avoid overhead watering that can damage flowers and spread disease.
Don't fertilize heavily. Too much nitrogen during flowering promotes leaves over fruit.
Signs of Trouble
Flowers but no fruit forming (poor pollination or temperature stress; see our Strawberry Troubleshooting Guide)
Black flower centers (frost damage; flowers won't produce fruit)
Deformed flowers (tarnished plant bug damage or botrytis infection)
How Does Fruit Develop After Pollination?
When it happens: 7 to 14 days after pollination
What you'll see: Petals fall away, revealing small green berries. Berries gradually enlarge over 2 to 4 weeks, remaining green and hard.
What's Actually Happening
After pollination, the receptacle (the central cone) begins swelling to become the strawberry flesh. The tiny "seeds" on the outside are actually achenes (the true fruits), each containing one seed. The red, juicy part we eat is technically an "accessory fruit."
During this stage, berries need consistent water to size up properly. Water stress now results in small, dry fruit. The plant is directing significant energy toward fruit development.
Care During Fruit Development
Water consistently. This is the most critical time for irrigation. Inconsistent watering causes small, misshapen, or bitter fruit.
Maintain mulch. Keep straw or other mulch under developing fruit to prevent soil contact, which causes rot and pest damage.
Scout for pests. Slugs, birds, and insects are attracted to developing fruit. Install bird netting before berries start ripening.
Remove damaged fruit. If berries show signs of disease or pest damage, remove them to prevent spread.
Signs of Trouble
Very small fruit that stops developing (water stress or too many berries for plant to support)
Misshapen fruit (poor pollination; each unfertilized seed creates a "dent")
Gray mold starting on green fruit (botrytis; remove affected berries immediately)
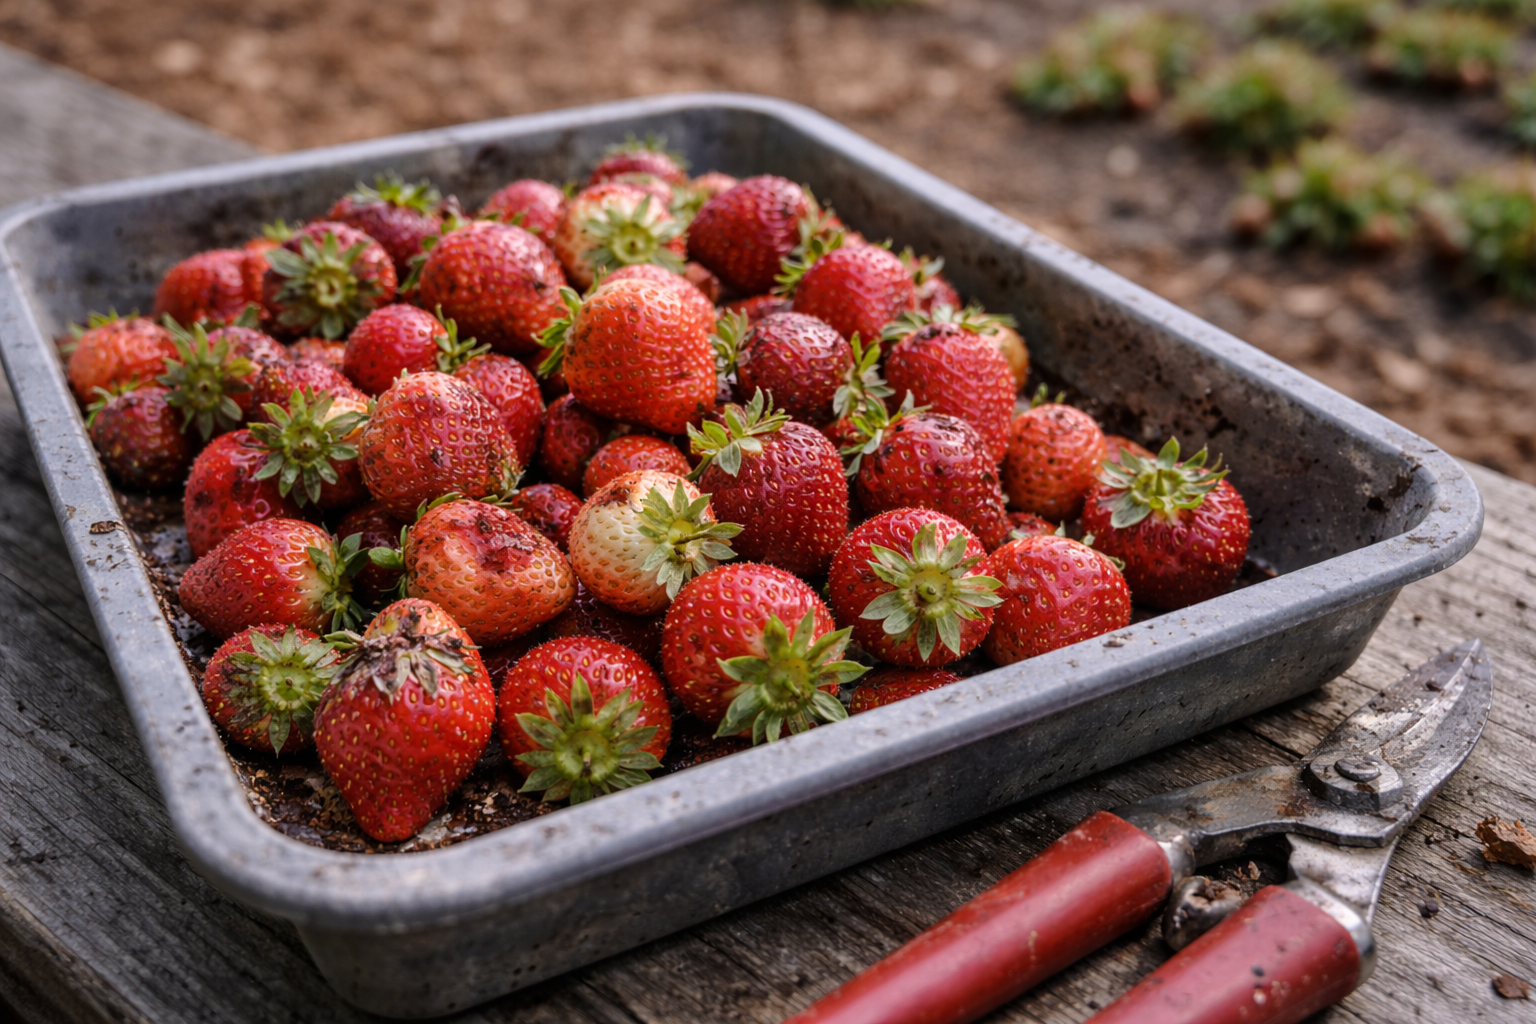
How Do You Know When Strawberries Are Ripe?
When it happens: 4 to 6 weeks after flowering; timing varies by variety and conditions
What you'll see: Green berries transition to white, then pink, then red (or whatever the ripe color is for your variety). Berries soften and develop their characteristic aroma.
What's Actually Happening
As berries ripen, chlorophyll breaks down (green fades), sugars accumulate (sweetness develops), and aromatic compounds form (strawberry smell). Anthocyanins develop, creating the red color. The berry reaches peak flavor at full ripeness.
Ripening accelerates in warm weather. Coastal fog can slow ripening but often results in more complex flavor development. A berry that ripens over more days may taste better than one that ripens quickly in heat.
Care During Ripening
Check daily. Ripe strawberries are perishable. Harvest every day or two during peak production.
Harvest in the morning. Berries picked while cool last longer than those picked in afternoon heat.
Pick fully ripe. Unlike some fruits, strawberries don't continue ripening after picking. Wait until fully colored for best flavor.
Handle gently. Ripe berries bruise easily. Grasp the stem, not the berry, when picking.
Signs of Trouble
Berries ripen unevenly (normal variation, but persistent issues may indicate nutrient deficiency)
Soft, mushy spots before full ripeness (botrytis starting; remove affected berries)
Birds or slugs eating ripe fruit (install netting; manage slugs with traps or bait)
When Do Strawberry Plants Produce Runners?
When it happens: Late spring through fall, peaking after main fruit production
What you'll see: Long stems (stolons) extend from the mother plant, each with a small plantlet at the end. Plantlets develop roots when they contact soil.
What's Actually Happening
Strawberries reproduce both by seed (slow, variable) and vegetatively through runners (fast, genetically identical). Runner production is the plant's way of spreading and creating new plants. Each plantlet is a clone of the mother.
Runner production often accelerates after fruiting, when plants have energy to spare. Day-neutral varieties generally produce fewer runners than June-bearing types.
Care During Runner Production
Decide your strategy. Remove runners to keep plants focused on fruit, or allow select runners to root for propagation.
If propagating: Guide runner tips to soil contact, pin down with landscape staples, and keep moist until rooted.
If removing: Cut runners as soon as they appear to redirect energy to the mother plant.
Don't let runners overcrowd. Too many unmanaged runners create a tangled mess with poor fruit production.
See our detailed guide: How to Multiply Strawberries from Runners
Signs of Trouble
No runners on otherwise healthy plants (some varieties produce few; also normal in first year)
Weak, spindly runners (plant is stressed or depleted; may need feeding or rest)
Disease spreading from mother to runners (remove diseased runners; don't propagate from sick plants)
What Happens During Fall Transition?
When it happens: October through November
What you'll see: Growth slows. Leaves may take on reddish or bronze tints. Runner production stops. Day-neutral varieties reduce flowering.
What's Actually Happening
As days shorten and temperatures cool, plants prepare for dormancy. They're redirecting energy from growth into storage, building reserves in the crown for winter survival and spring regrowth.
In Santa Cruz County, this transition is gradual. Coastal gardens may not see dramatic changes. Inland areas experience more obvious slowdown.
Care During Fall Transition
Reduce watering. Plants need less water as growth slows. Overwatering during fall can cause root rot.
Final cleanup. Remove dead leaves, spent fruit trusses, and excess runners.
Refresh mulch. A good mulch layer protects crowns through winter.
Don't fertilize. Late-season fertilizer promotes tender growth that's vulnerable to cold.
Assess plant health. Decide which plants to keep and which to replace in spring.
Signs of Trouble
Plants still pushing heavy growth (excessive nitrogen or unseasonably warm; growth may be damaged by first frost)
Crown rot appearing (too much fall moisture; improve drainage before winter)
How Do Growth Stages Differ by Variety Type?
| Variety Type | Growth Pattern | Stage Behavior | Care Implications |
|---|---|---|---|
| Day-Neutral Albion, Seascape, San Andreas, Monterey |
Continuous
Flowers and fruits whenever temps are 40-90°F. Multiple stages overlap throughout the season. |
Stages blur together. You'll see flowers, green fruit, ripe fruit, and runners simultaneously from spring through fall. No distinct "harvest season." |
|
| June-Bearing Chandler, Sequoia, Camarosa |
Concentrated
Distinct stages in sequence. One big harvest in late spring/early summer, then runner production. |
Classic progression: dormancy → vegetative → flowering → fruiting → runners → dormancy. Each stage is distinct and predictable. |
|
| Everbearing (Often grouped with day-neutral) |
2-3 Flushes
Two or three distinct harvest periods per year, typically spring and fall, with lighter summer production. |
Hybrid behavior: more predictable than day-neutral but with multiple production cycles. Spring flush is usually largest. |
|
Day-Neutral Varieties (Albion, Seascape)
Day-neutral plants blur the lines between stages, often flowering and fruiting continuously while also producing leaves and runners. You'll see multiple stages happening simultaneously from spring through fall.
This makes care more complex but also more rewarding, as you harvest over many months rather than all at once.
June-Bearing Varieties (Chandler, Sequoia)
June-bearing plants follow the classic stage progression: dormancy → vegetative growth → concentrated flowering → intense fruiting → runner production → dormancy.
The clear separation between stages makes care more straightforward. You know when to fertilize for vegetative growth (early spring), when to protect flowers (bloom time), and when harvest will occur (late spring/early summer).
Once you can read a strawberry bed, the rest of the garden gets easier too. See our blackberry and raspberry growth stage guides for the caneberries, or browse growth stage guides for every crop, from peppers to apples.
Frequently Asked Questions
How long does it take a strawberry plant to go from flower to ripe fruit?
About 4 to 6 weeks from flower opening to ripe fruit, depending on variety and weather conditions. Warm weather speeds ripening; coastal fog and cool temperatures slow it down (but often improve flavor).
Why is my strawberry plant producing lots of leaves but no flowers?
Excessive nitrogen fertilizer is the most common cause. Plants put energy into leaves instead of flowers. Reduce fertilizer and wait for the plant to rebalance. Also verify you have the right variety type for your expectations.
When should I fertilize strawberry plants?
First feeding when new growth appears in early spring (late February to March locally). Second light feeding during active vegetative growth. Avoid fertilizing during heavy flowering or fruit production, and never in fall.
Do strawberry plants need to go dormant?
June-bearing varieties benefit from winter chill to trigger proper flowering. Day-neutral varieties don't require dormancy but still slow down during short days. In Santa Cruz County's mild climate, dormancy is often brief or partial.
How do I know if my strawberry plant is dead or just dormant?
Check the crown. If it's firm and shows any green or white tissue when you gently scrape it, the plant is alive. If the crown is mushy, brown throughout, or pulls away easily, the plant is dead. When in doubt, wait until late March to see if new growth emerges.
Why are my strawberry flowers turning black?
Frost damage. Flower centers killed by freezing temperatures turn black and won't produce fruit. Protect plants on cold nights in frost-prone areas.
How many years do strawberry plants produce?
Most strawberry plants produce well for 2 to 3 years before declining. Plan to renew your patch periodically by replacing old plants with new ones or rooted runners.
When do strawberry plants produce runners?
Primarily late spring through fall, with peak production after the main fruiting period. Day-neutral varieties generally produce fewer runners than June-bearing types.
How Can You Grow with the Seasons?
Understanding strawberry growth stages transforms you from a reactive gardener into a proactive one. Instead of wondering why your plants look a certain way or what they need, you'll recognize each stage and provide exactly the right care at the right time. Whether you're growing day-neutral varieties with their overlapping stages or June-bearing types with their classic progression, this knowledge helps you anticipate what's coming next and prepare accordingly. Pay attention to your plants, note what you observe, and soon reading their growth stages will become second nature. For month-by-month guidance on what to plant alongside your strawberries, check our Seasonal Planting Guides, and monitor current conditions on our Garden Conditions Dashboard.
Free Gardening Resources
Find all our free guides in Your Garden Toolkit.
More Strawberry Growing Guides
Part of our Complete Strawberry Series for Santa Cruz County:
Growing Strawberries in Santa Cruz County: A Local Guide to Sweet Success - Everything you need to know about growing strawberries in our coastal climate
Best Strawberry Varieties for Santa Cruz County - Which varieties thrive here and where to find them locally
Planting Bare-Root Strawberries: A Santa Cruz Guide - Step-by-step instructions for bare-root planting success
Growing Strawberries: In the Ground vs. Raised Beds vs. Containers - Compare your planting options and find the best fit for your space
How to Multiply Strawberries from Runners (Free Plants Forever) - Propagate new plants from runners for an ever-expanding patch
Top Strawberry Mistakes New Gardeners Make (And How to Avoid Them) - Common pitfalls and how to sidestep them
Strawberry Troubleshooting Guide - Identify and solve pests, diseases, and growing problems
Reviving Your Strawberry Patch After Harsh Weather - Recovery strategies for storm or heat-damaged plants