

Best Microgreen Varieties to Grow at Home: Flavor, Nutrition, Ease
A few of the product links in this guide are affiliate links. If you buy through one, Ambitious Harvest may earn a small commission at no extra cost to you, which helps keep these guides free. We only point to gear we would use in our own Santa Cruz garden. As an Amazon Associate, we earn from Read our full disclosure.
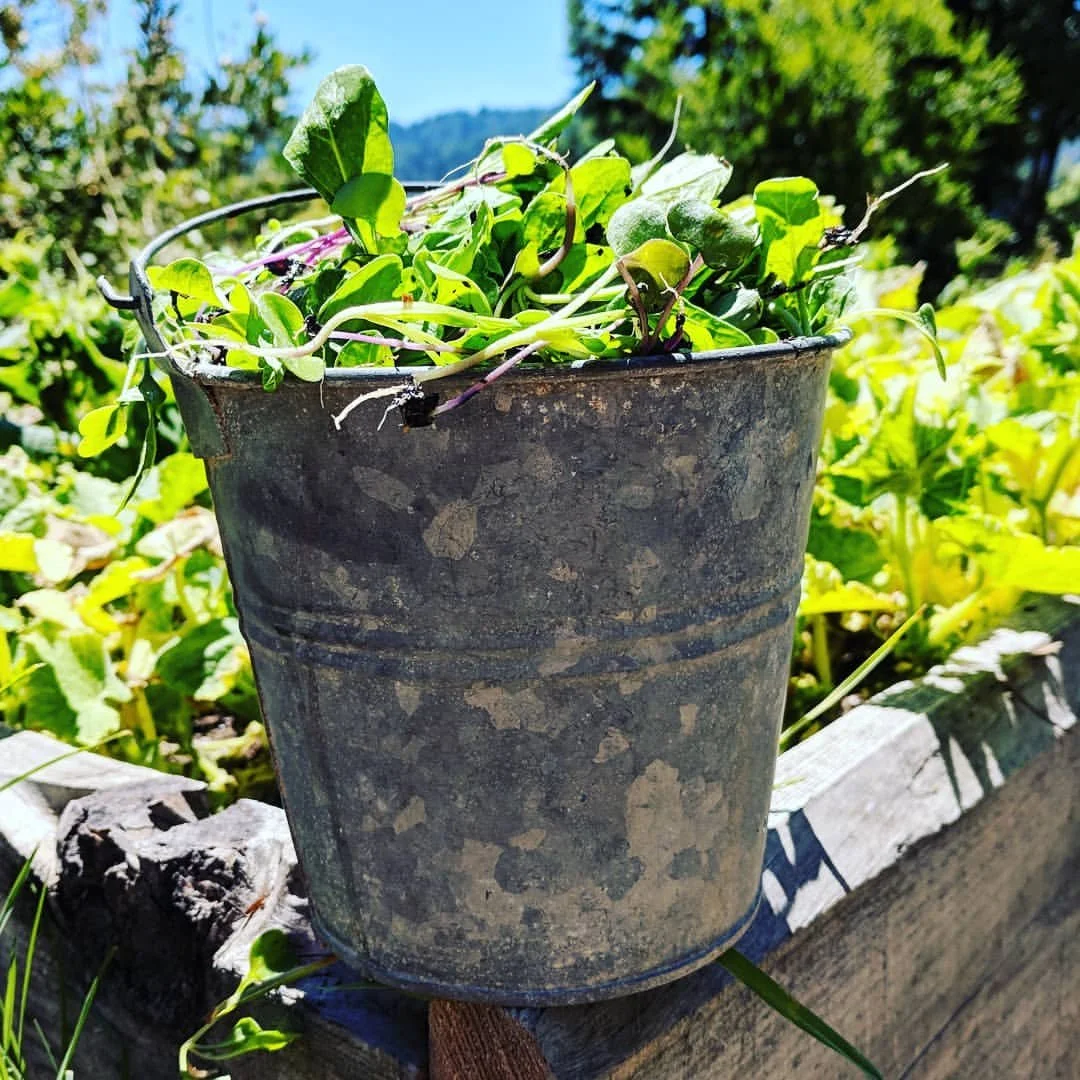
The best microgreen varieties for home growers combine quick germination, reliable growth, and genuine flavor. Sunflower, pea shoots, and radish top most beginner lists for their large seeds, fast turnaround (7 to 12 days), and forgiving nature, according to recommendations from university extension programs including UC Master Gardeners. For a complete walkthrough of equipment and technique, see our guide to growing microgreens at home. The UC Master Gardener Real Dirt blog confirms that microgreens can be grown year-round in a sunny window with just soil, seeds, a container, and water. But once you have the basics down, a wider world of flavor and nutrition opens up. This guide covers more than 20 varieties organized by ease, nutrition, flavor, and visual appeal, so you can choose the right microgreens for your kitchen and your skill level.
What Makes a Microgreen Variety "Easy" or "Difficult"?
Before diving into specific varieties, it helps to understand what separates a beginner-friendly microgreen from a more challenging one. Several factors matter:
Seed size. Larger seeds (sunflower, pea, corn) are easier to handle, distribute evenly, and monitor during germination. Tiny seeds (basil, amaranth, celery) can clump together, leading to uneven growth and mold issues.
Germination speed and uniformity. Some seeds germinate within 24 to 48 hours and grow in a uniform carpet. Others are staggered, with some seeds sprouting days before others, which makes timing your harvest tricky.
Mucilaginous coating. Certain seeds (basil, chia, cress, flax) produce a gel-like coating when wet. This mucilage makes them stick together and can create conditions for mold. These varieties require different techniques, like dry-seeding on top of a moist medium rather than misting directly.
Temperature sensitivity. Most microgreens are flexible, but some (basil, cilantro) prefer warmer conditions and may germinate poorly in cool rooms.
Days to harvest. Faster varieties give beginners quicker feedback and shorter windows for things to go wrong.
Understanding these factors helps you choose varieties that match your current experience level and your growing environment. In a Santa Cruz home where indoor temperatures typically hover between 62 and 72 degrees Fahrenheit, most varieties do well without supplemental heat.
What Are the Easiest Microgreen Varieties for Beginners?
Start here. These varieties are reliable, fast, and satisfying.
Sunflower
Days to harvest: 8 to 12 Seed type: Large (black oil sunflower, food-grade) Pre-soak: Yes, 8 to 12 hours Flavor: Mild, nutty, slightly sweet Growing notes: Sunflower microgreens are often the first variety recommended to beginners, and for good reason. The large seeds are easy to handle and produce thick, sturdy stems topped with broad cotyledons. They germinate vigorously and grow into one of the most substantial microgreens you can harvest. Use a weight on top during the blackout phase to help the seedlings shed their hulls. Some hulls will still cling to the leaves at harvest, and you can gently brush or rinse them off. Sunflower microgreens are a staple at Santa Cruz farmers markets, and growing your own costs a fraction of the retail price.
Pea Shoots
Days to harvest: 8 to 14 Seed type: Large (field peas or snow peas) Pre-soak: Yes, 8 to 12 hours Flavor: Sweet, fresh, unmistakably "pea" Growing notes: Pea shoots produce tall, tendril-laden greens with a sweet flavor that works in salads, stir-fries, and sandwiches. They grow quickly and abundantly. One tray of pea shoots yields an impressive volume. Pea shoots are one of the few microgreens that may produce a second, smaller harvest if you cut above the lowest leaf node. They are slightly more tolerant of lower light conditions than many other varieties, making them a good choice for homes without south-facing windows.
Radish
Days to harvest: 5 to 7 Seed type: Small to medium Pre-soak: No Flavor: Peppery, crisp, bright Growing notes: Radish microgreens are the speed champions of the microgreen world. You can go from dry seed to harvest in under a week. They germinate almost overnight and grow vigorously. The stems often develop attractive pink, red, or purple coloring depending on the variety. China Rose, Hong Vit, and Daikon are popular radish varieties for microgreens. Their spicy kick makes them a natural addition to tacos, sandwiches, and Asian-inspired dishes. If you want the fastest possible success to build your confidence, start with radish.
Broccoli
Days to harvest: 8 to 12 Seed type: Small Pre-soak: No Flavor: Mild, slightly earthy, pleasant Growing notes: Broccoli microgreens are easy to grow and are among the most studied for nutritional content. Research from Johns Hopkins University brought attention to their sulforaphane content, a compound being studied for potential health benefits. The mild flavor makes them easy to add to almost anything. They produce fine, delicate greens, so do not be surprised by their smaller stature compared to sunflower or pea shoots. Distribute seeds evenly for the best results.
Wheatgrass
Days to harvest: 7 to 10 (first cutting) Seed type: Medium (hard red winter wheat berries) Pre-soak: Yes, 8 to 12 hours Flavor: Sweet, grassy Growing notes: Wheatgrass is technically a grass, not a microgreen in the traditional sense, but the growing process is nearly identical. It is grown primarily for juicing. Wheatgrass is extremely forgiving and grows in a thick, vibrant green carpet. It can regrow after the first cut. A dedicated wheatgrass juicer or a high-powered blender is needed to extract the juice, as the fibers are too tough to eat whole.
Which Microgreen Varieties Are Most Nutritious?
If your primary goal is maximizing nutrition, these varieties stand out based on published research. For a deeper look at the science, see our article on microgreens nutrition and health benefits.
Red Cabbage
Days to harvest: 8 to 12 Key nutrients: Vitamin C, anthocyanins Research highlight: The landmark 2012 study by Xiao et al. at the University of Maryland and USDA found that red cabbage microgreens contained approximately 6 times more vitamin C and 69 times more vitamin K than mature red cabbage. Red cabbage microgreens also showed high levels of anthocyanins, the pigments responsible for their vivid purple-red color, which are associated with antioxidant activity. A UC ANR fact sheet on microgreens notes that microgreens can contain four to six times more vitamins and minerals than mature plants of the same variety. Growing notes: Red cabbage microgreens are moderately easy to grow and produce beautiful, colorful greens. They are a brassica, so growing techniques are similar to broccoli and radish.
Cilantro (Coriander)
Days to harvest: 14 to 21 Key nutrients: Carotenoids (lutein, beta-carotene, zeaxanthin), vitamin C Research highlight: The same University of Maryland/USDA study found that cilantro microgreens contained notably high concentrations of carotenoids, including lutein, beta-carotene, and zeaxanthin, compared to many other microgreen varieties tested. These carotenoids are associated with eye health and antioxidant function. Growing notes: Cilantro is one of the slower and more temperamental microgreen varieties. Seeds benefit from a gentle pre-soak and prefer warmer germination temperatures (68 to 75 degrees Fahrenheit). Patience is required, as germination is slower and less uniform than brassicas. The flavor is distinctly cilantro and works wonderfully in Mexican and Asian dishes.
Radish (for Vitamin E)
Key nutrients: Vitamin E (tocopherols), vitamin C Research highlight: The Xiao et al. study found that radish microgreens were among the highest in vitamin E (alpha-tocopherol) content of all 25 varieties tested. Given how quick and easy radish microgreens are to grow, they offer an excellent nutrition-to-effort ratio.
Broccoli (Sulforaphane)
Key nutrients: Sulforaphane, vitamins C and E Research highlight: Research at Johns Hopkins University has focused on sulforaphane, a compound found in high concentrations in broccoli sprouts and young broccoli plants. While much of the published research specifically studied broccoli sprouts, broccoli microgreens also contain this compound. Sulforaphane is being studied for a range of potential health benefits, though it is important to note that most research is preliminary or cell-based, and definitive health claims should not be overstated.
Green Daikon Radish
Days to harvest: 6 to 8 Key nutrients: Vitamin C, vitamin E, beta-carotene Research highlight: Daikon radish microgreens scored well across multiple nutrient categories in the University of Maryland/USDA study, making them one of the most nutritionally well-rounded microgreens tested. They combine the speed and ease of other radish varieties with an impressive nutrient profile.
Which Varieties Have the Best Flavor?
For cooks and food lovers, these varieties bring the most interesting flavors to the table.
Basil
Days to harvest: 12 to 20 Flavor profile: Sweet, aromatic, unmistakably basil Growing notes: Basil microgreens are among the more challenging varieties because the seeds are mucilaginous (they form a gel coating when wet) and prefer warm temperatures for germination. Sow on a moist surface without covering with soil, and avoid heavy misting directly on the seeds. If your Santa Cruz home runs cool, a seedling heat mat helps considerably. You can also grow basil alongside herbs on a California windowsill herb garden. The reward is worth the effort: intensely flavored tiny basil leaves that elevate any dish.
Mustard (Various Varieties)
Days to harvest: 7 to 10 Flavor profile: Spicy, hot, pungent (intensity varies by variety) Growing notes: Mustard microgreens bring heat. Varieties range from the mild warmth of yellow mustard to the sharp bite of red or purple mustard. They grow quickly and reliably, similar to radish. Mizuna, a Japanese mustard green, produces a milder, more complex flavor. Mustard microgreens are excellent in sandwiches, on pizza, or anywhere you want a peppery kick.
Amaranth (Red Garnet)
Days to harvest: 10 to 14 Flavor profile: Mildly earthy, slightly sweet, beet-like Growing notes: Red garnet amaranth is grown as much for its stunning deep magenta color as for its flavor. The seeds are tiny (dust-like), so distribution requires care. Sprinkle them as evenly as possible. Despite the small seeds, amaranth microgreens are relatively easy to grow once you get the sowing technique down. They add dramatic color to any plate.
Arugula
Days to harvest: 7 to 10 Flavor profile: Peppery, nutty, slightly bitter Growing notes: Arugula microgreens taste like a concentrated version of mature arugula. They grow quickly and reliably. If you enjoy arugula in salads, you will love the microgreen version, which is more tender with a cleaner peppery flavor. Easy to grow and a natural companion to radish microgreens in a spicy salad mix.
Fennel
Days to harvest: 12 to 16 Flavor profile: Sweet, licorice-like, delicate Growing notes: Fennel microgreens have a gentle anise flavor that works beautifully as a garnish for fish, soups, and salads. Germination is slower than brassicas and the plants are more delicate. Fennel microgreens are a more advanced choice but well worth trying once you have some experience.
Which Microgreen Varieties Are Most Beautiful for Garnishing?
If visual presentation matters to you (and it should, because we eat with our eyes first), these varieties bring color and elegance to plated dishes.
Red garnet amaranth. Deep magenta stems and leaves. Perhaps the most visually striking microgreen available.
Red cabbage. Purple stems with green cotyledons. Beautiful color contrast.
Purple kohlrabi. Vivid purple stems. Similar to red cabbage but with slightly different coloring.
Bull's blood beet. Deep red stems and dark green to burgundy leaves. Stunning in salads.
Shiso (Perilla). Available in green or red-purple varieties. An elegant garnish with complex flavor (hints of cinnamon, mint, and basil).
Sorrel (Red Veined). Green leaves with red veining. Tangy, lemony flavor adds both visual interest and a bright taste.
For restaurant-quality presentation at home, grow a mix of two or three colorful varieties. A combination of red amaranth, green pea shoots, and purple radish microgreens creates a visually stunning garnish that also tastes excellent.
How Do You Choose the Right Variety for Your Situation?
Consider your goals:
If you have never grown microgreens before: Start with radish (fastest feedback), sunflower (most satisfying), or pea shoots (sweetest flavor). Grow one variety at a time until you are comfortable with the process.
If you want maximum nutrition: Focus on red cabbage, broccoli, radish, and cilantro microgreens. Rotate varieties to get a range of nutrients.
If you love cooking and want the best flavors: Grow basil, mustard, arugula, and cilantro. A small rotation of flavor-forward varieties keeps your cooking interesting.
If you want to impress guests: Grow red amaranth, bull's blood beet, and purple kohlrabi for their stunning visual impact.
If you are growing for kids: Sunflower and pea shoots have the mildest, sweetest flavors and tend to be the most accepted by younger palates.
If you want to save money at the grocery store: Grow the varieties you buy most often. Sunflower greens, pea shoots, and mixed brassica microgreens are commonly sold at premium prices at California farmers markets and health food stores.
How Can You Create a Continuous Microgreen Rotation?
Once you settle on a few favorite varieties, set up a simple rotation to ensure you always have fresh microgreens available. The concept is called succession planting, and it is the same principle experienced gardeners use in outdoor beds.
For a household of two, planting one standard tray every 5 to 7 days is typically sufficient. Choose two or three varieties and rotate through them. For example:
- Week 1: Plant radish
- Week 2: Plant sunflower
- Week 3: Plant pea shoots
- Week 4: Return to radish
This gives you a continuous harvest with variety. Label each tray with the variety name and planting date using a piece of masking tape. As you harvest one tray, compost the spent medium and roots, clean the tray, and start the next round.
In Santa Cruz's moderate climate, you can maintain this rotation year-round without any seasonal adjustments, as we cover in our guide to year-round indoor growing in California. The consistent indoor temperatures in most homes provide stable growing conditions regardless of the season.
Frequently Asked Questions
Can you mix different microgreen seeds in the same tray?
You can, but it works best when you combine varieties with similar germination times and growth rates. Mixing radish (5 to 7 days) with sunflower (8 to 12 days) in the same tray creates problems because one is ready to harvest days before the other. Good combinations include radish and mustard, broccoli and kale, or a mix of different brassica varieties. Many seed companies sell pre-mixed microgreen blends designed for compatible growing.
How much do microgreen seeds cost compared to regular garden seeds?
Microgreen seeds are typically sold in bulk quantities (by the ounce or pound) at a lower per-seed cost than standard garden seed packets. Expect to pay $3 to $8 per ounce for most varieties, with specialty varieties like basil and shiso costing more. One ounce of small seeds like broccoli or radish is enough for one standard 10x20 tray. Larger seeds like sunflower and pea require 1.5 to 2 ounces per tray. Buying in larger quantities (quarter-pound or pound bags) reduces the cost further.
Do different microgreen varieties need different amounts of light?
Most microgreens are not highly demanding about light intensity. A basic LED shop light or grow light positioned 4 to 6 inches above the tray works for virtually all varieties. That said, some varieties (sunflower, pea shoots) are more tolerant of lower light conditions, while others (basil, cilantro) perform better with stronger light. In Santa Cruz, a south-facing window provides adequate light for most varieties from spring through fall, but supplemental lighting helps during our shorter, cloudier winter days. UC Master Gardeners in the Coastal Gardener column recommend microgreens as an ideal indoor winter growing project for exactly this reason.
Which microgreen varieties have the longest shelf life after harvest?
Heartier varieties like sunflower and pea shoots tend to last longest after harvest, keeping well in the refrigerator for 7 to 10 days. More delicate varieties like basil and cilantro microgreens have shorter shelf lives, typically 3 to 5 days. For maximum freshness, harvest only what you plan to use within a few days and let the rest continue growing on the tray. This "harvest as needed" approach is one of the advantages of growing your own.
Are there any microgreen varieties you should avoid as a beginner?
Avoid mucilaginous seeds (basil, chia, cress, flax) until you have some experience, as they require modified techniques to prevent clumping and mold. Also hold off on very slow-germinating varieties like celery, carrot, and parsley microgreens, which can take 14 to 21 days and test your patience. Nightshade family microgreens (tomato, pepper, eggplant) should be avoided entirely, as the leaves of these plants can contain solanine and other alkaloids that are not safe to eat.
Can you save seeds from your garden to grow as microgreens?
Yes, as long as the seeds are clean, dry, and free from fungicide treatments. Seeds saved from open-pollinated garden plants work well for microgreens. However, hybrid varieties will also work fine for microgreens since you are not growing the plant to maturity. The key requirement is that seeds are untreated. Seeds coated with fungicides (often visible as a pink, blue, or green coating) should not be used for microgreen or sprout production. For more on safe sprouting practices, see our guide to growing sprouts at home safely.
Want more guidance on growing fresh food year-round in California? Download our free California Growing Guide at ambitiousharvest.com/your-garden-toolkit for seasonal planting calendars, variety guides, and tips tailored to Santa Cruz and the Central Coast.