

How to Plant and Care for Olallieberries: A Year-Round Guide
A few of the product links in this guide are affiliate links. If you buy through one, Ambitious Harvest may earn a small commission at no extra cost to you, which helps keep these guides free. We only point to gear we would use in our own Santa Cruz garden. As an Amazon Associate, we earn from Read our full disclosure.
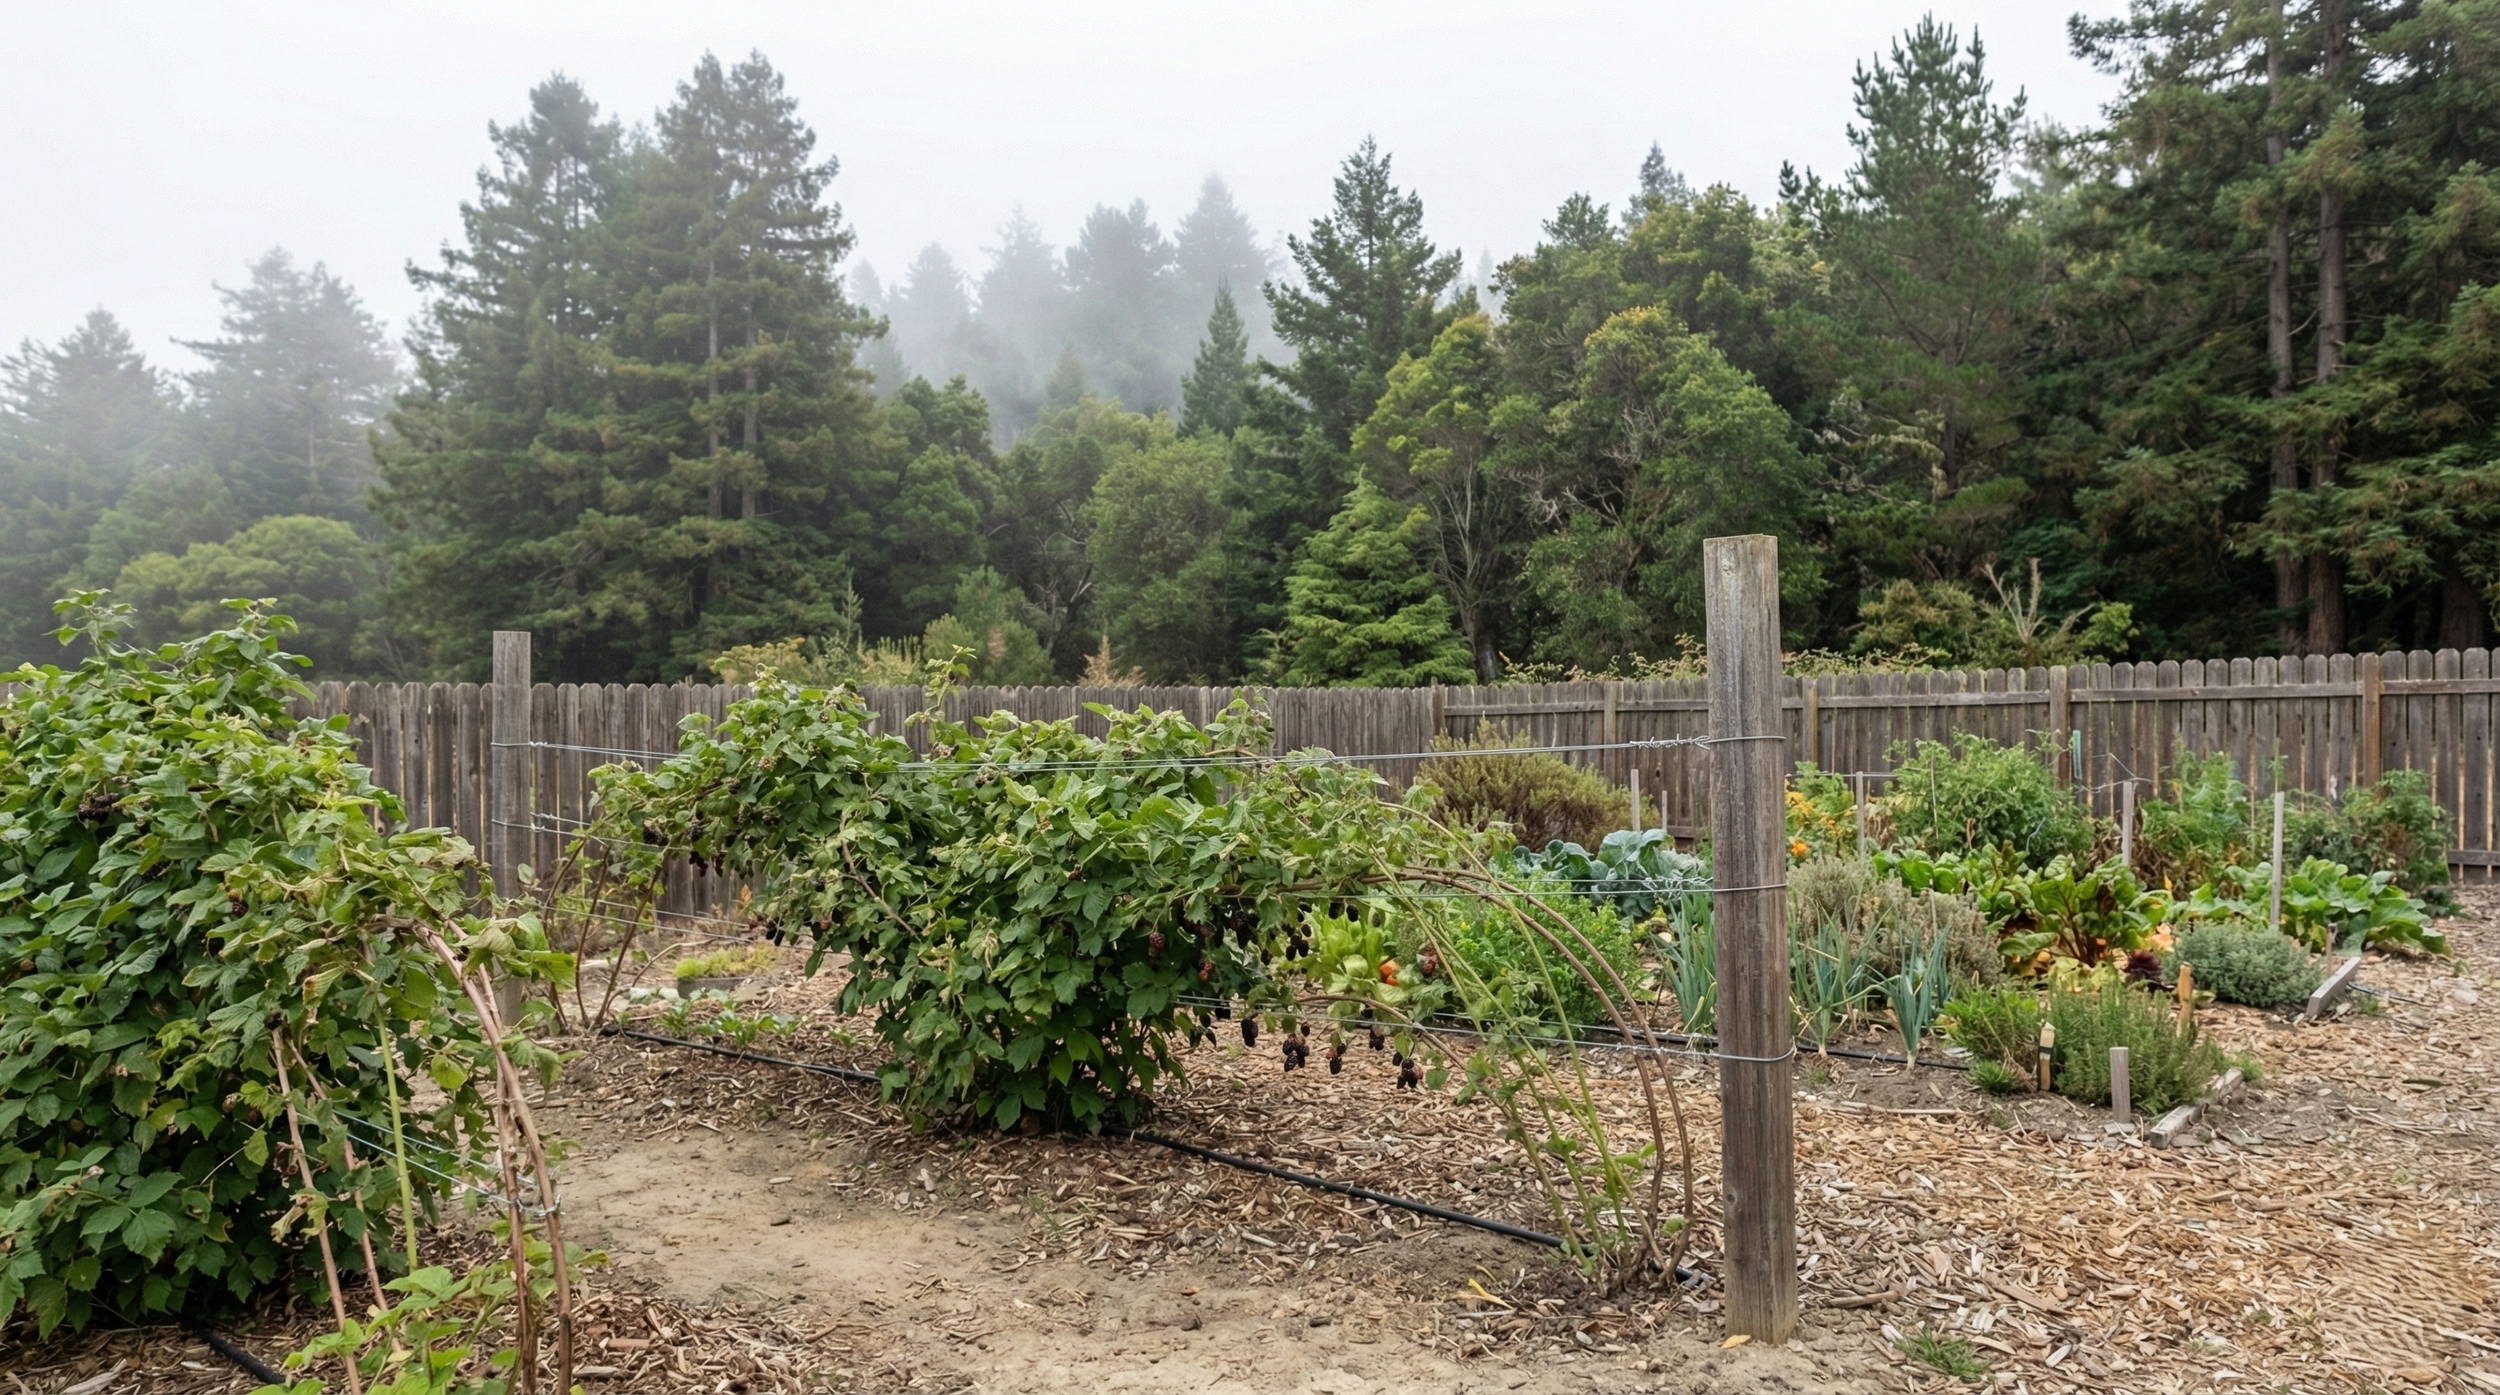
So you've decided to grow olallieberries. You've got a sunny fence line or space for a trellis, you understand these are trailing, thorny vines that need support, and you're ready to turn a bare-root plant into years of pie-worthy harvests.
This article is your step-by-step playbook, from getting plants in the ground through the annual cycle of training, pruning, and care that produces abundant fruit. We'll cover the practical details that the overview article touched on, with specific timing for Santa Cruz County's climate and conditions.
How Should You Choose the Right Site?
Before you dig, make sure you're setting your olallieberries up for success.
Sun and Exposure
Olallieberries perform best in full sun (6 or more hours of direct sunlight), though they'll tolerate light afternoon shade, especially in warmer inland microclimates.
Coastal Santa Cruz (Westside, Live Oak, Aptos): Grab the sunniest spot you have. Our fog provides natural cooling, so heat protection isn't a concern. South-facing fences and walls are ideal.
Inland areas (San Lorenzo Valley, Scotts Valley): Morning sun with afternoon shade can actually help prevent heat stress. Avoid the hottest, most exposed locations.
Avoid:
Deep shade (less than 4 hours of sun)
Low spots where cold air pools (frost pockets)
Areas with poor air circulation (promotes disease)
Soil Requirements
Olallieberries need:
Good drainage: They're susceptible to root rot in waterlogged soil
Loam or sandy loam: Ideal texture for root health
pH 5.5-6.5: Slightly acidic to near-neutral
Organic matter: Work in compost before planting
If you have heavy clay: Consider raised beds or mounded rows. Amending clay with copious compost helps, but truly heavy clay may never drain adequately.
Space Planning
Remember that olallieberry canes can grow 10-15 feet in a single season. Plan for:
Trellis or fence line: At least 4-5 feet tall
Access: Leave enough room to reach both sides for pruning and picking
Containment: They'll spread via suckers; plan how you'll keep them in bounds
How Should You Plan Your Trellis and Layout?
Olallieberries absolutely require trellising. Without support, the canes sprawl into an unmanageable, impenetrable tangle. Planning your support structure before planting saves headaches later.
Trellis Height and Design
Minimum height: 4-5 feet
Simple two-wire trellis:
Set sturdy posts (4x4 wood or metal T-posts) at least 2 feet deep
Space posts every 15-20 feet
Run galvanized wire at approximately 3 feet and 5 feet high
Use wire tensioners to keep lines taut
Fence-line planting: An existing sturdy fence (chain link, welded wire, or wood with wire attached) works well. The fence provides support; you just need to train and tie canes.
T-trellis (more advanced): Cross-arms at the top of posts allow you to spread canes horizontally, maximizing sun exposure and making harvest easier. More work to build but excellent for serious production.
Spacing
For home garden trellises, space plants 3-4 feet apart. This gives each plant room to develop while allowing canes to fill in the trellis without excessive crowding.
Wider spacing (6-8 feet): Gives each plant more room and can reduce disease pressure, but leaves gaps in the trellis that take longer to fill.
Orientation
If possible, orient rows north-south to maximize sun exposure on both sides. If your site dictates east-west rows, that's fine. The more important factor is morning sun to dry dew and reduce disease.
How Do You Plant Bare-Root vs. Potted Olallieberries?
Olallieberry Planting & Care
Step-by-Step Guide for Santa Cruz County Gardens
Trellis Specifications
- Post Height:5-6 feet above ground
- Post Spacing:8-10 feet apart
- Wire Heights:2 ft, 3.5 ft, and 5 ft
- Wire Type:12-gauge galvanized
- Post Material:4x4 treated wood or metal T-posts
- Why Required:Trailing canes can reach 15+ feet!
Prepare Soil
Amend with compost. Ensure excellent drainage. Slightly acidic pH (5.5-6.5) is ideal.
Dig Hole
Twice as wide as roots, same depth. Space plants 6-8 feet apart in row.
Position Plant
Crown at or slightly above soil level. Spread roots in hole. Never bury crown!
Backfill & Water
Fill hole, firm gently. Water deeply to settle soil and eliminate air pockets.
Mulch
3-4 inches of wood chips or straw. Keep mulch away from crown (2-3 inch gap).
Cut Back
Prune bare root canes to 6 inches. This encourages strong root development.
Year 1: Establishment
- Primocanes emerge and grow (may reach 10+ feet)
- Train canes along trellis wires as they grow
- No fruit this year (that's normal!)
- Keep watered, weed-free, and healthy
Year 2: First Harvest!
- Last year's primocanes are now floricanes
- Floricanes flower and fruit (June)
- New primocanes grow simultaneously
- Remove floricanes after harvest
Year 3+: Full Production
- Established pattern: grow → fruit → remove
- Thin canes to 4-6 per foot of row
- Annual pruning is essential
- Expect 10-15+ years of production
The 2-Year Cycle
- Primocane: First-year cane (vegetative)
- Floricane: Second-year cane (fruits, then dies)
- You'll always have both growing
- Only remove canes AFTER they fruit
Dec-Feb
Plant bare root. Thin primocanes. Repair trellis. Remove debris.
Mar-May
Fertilize. Start irrigation. Watch for mildew. Train new growth.
Jun-Jul
Pick berries. Remove spent floricanes. Continue watering.
Aug-Nov
Tie up primocanes. Reduce water. Cleanup. Prepare for dormancy.
Foggy Coastal (Aptos, Westside, Capitola)
Natural humidity helps. Less supplemental water needed.
Inland/Warmer (Scotts Valley, Boulder Creek sunny)
More evaporation. Watch for wilting in afternoon heat.
Always use drip irrigation. Wet foliage = powdery mildew (our #1 problem).
Critical Care Reminders
When to Plant
Bare-root plants: Plant during dormancy, typically December through February in Santa Cruz County. This is the most economical option and gives roots time to establish before spring growth.
Potted plants: Can be planted almost any time, but late winter to early spring (February-March) is ideal. Avoid planting in summer heat if possible.
Planting Bare-Root Olallieberries
Soak roots in water for 1-2 hours before planting
Trim damaged roots with clean pruners
Dig a hole wide enough to spread roots without crowding, deep enough that the crown sits at soil level
Create a small mound in the center of the hole
Spread roots over the mound
Backfill with native soil mixed with compost, firming gently
Water thoroughly to settle soil and eliminate air pockets
Mulch with 2-3 inches of organic material, keeping it away from the crown
Cut canes back to 6-8 inches to direct energy into root development
Planting Potted Olallieberries
Water the pot thoroughly an hour before planting
Dig a hole twice as wide as the root ball, same depth
Remove plant from pot; gently loosen any circling roots
Set in hole at the same depth it was growing in the pot
Backfill and firm
Water deeply
Mulch around the plant
What Does First-Year Care Look Like for Establishment?
Your primary goal in year one is establishing a strong root system and healthy primocanes. Don't expect (or want) fruit the first year.
Watering Schedule
Frequency: Water deeply at least weekly, more often in sandy soil or during hot spells.
Amount: Aim for 1-2 inches per week from rain or irrigation combined.
Coastal gardens: Our fog provides some moisture, and cooler temperatures reduce evaporation. You may need less supplemental water than inland gardeners.
Inland gardens: Plan for more frequent watering, especially during warm periods. Drip irrigation or soaker hoses work well.
First-Year Fertilizing
Go easy. Over-fertilizing young plants produces excessive vegetative growth at the expense of root development.
Application: One modest application of balanced fertilizer (10-10-10 or similar) in mid-summer (June-July).
Organic option: Side-dress with finished compost in early summer.
Training Primocanes
As primocanes grow through the first season:
Tie them loosely to your trellis or fence
Direct growth where you want it rather than letting canes flop
Don't top them in year one; let them grow to full length
By fall, you should have several healthy canes 8-12 feet long, trained along your trellis and ready to produce fruit the following summer.
What Does the Year-Round Care Calendar Look Like in Santa Cruz County?
Here's a seasonal guide to olallieberry care based on our local conditions.
Winter (December - February)
Tasks:
Plant bare-root stock while dormant
Prune out any dead or damaged canes
Check trellis for needed repairs
Refresh mulch if thin
Order plants if you haven't already
Notes: This is your main window for structural work and planting. Take advantage of the dormant season to get plants established.
Spring (March - May)
Tasks:
Resume regular irrigation as weather warms
Weed control; keep area around plants clear
Watch for new primocanes emerging from crown
Thin crowded shoots if needed (keep 4-6 strong canes)
Apply balanced fertilizer as growth begins (late March/April)
Notes: As weather warms, primocanes grow rapidly. Tie new growth to the trellis regularly to prevent tangling.
Summer (May - July)
Tasks:
Harvest (typically late May through June)
Continue watering; increase frequency during dry periods
After harvest: Remove all canes that fruited (floricanes) at ground level
Re-tie primocanes that will fruit next year
Light second fertilizer application after harvest
Notes: The harvest window is brief and intense. Pick every 2-3 days during peak season. Post-harvest pruning is critical; don't delay removing spent floricanes.
Fall (August - November)
Tasks:
Light cleanup pruning
Check for pest and disease issues; remove affected material
Top-dress with compost
Reduce watering as rains return
Prepare trellis for winter storms (check ties, post stability)
Notes: The plant is building energy reserves for next year. Keep it healthy but don't push growth with late fertilization.
How Should You Water Olallieberries: Coastal vs. Inland?
Coastal Santa Cruz Gardens
Advantages: Fog provides natural moisture; cooler temperatures reduce water needs; slower drying keeps soil moist longer.
Challenges: Heavy soils can stay too wet; persistent dampness promotes fungal diseases.
Strategy:
Water deeply but less frequently
Monitor for signs of overwatering (yellowing leaves, root rot)
Focus on excellent drainage
Watch for powdery mildew in damp conditions
Inland and Warmer Microclimates
Advantages: Better air circulation; faster drying reduces disease pressure.
Challenges: Higher water needs; heat stress potential; more evaporation.
Strategy:
Water more frequently, especially during heat waves
Deep watering encourages deep roots
Mulch heavily (3-4 inches) to retain moisture
Consider afternoon shade cloth during extreme heat
Drip irrigation or soaker hoses for efficient delivery
Watering Guidelines
Established plants: 1-2 inches per week from all sources
During bloom and fruit: Increase to 2 inches weekly
After harvest: Reduce to maintenance levels
Winter: Rely on rainfall; supplement only during dry spells
How Do You Manage Fertilizer and Soil Health Over Time?
Annual Soil Building
Each year, top-dress around plants with 1-2 inches of finished compost or aged manure. This:
Adds organic matter
Feeds soil biology
Improves water retention
Provides slow-release nutrients
Fertilizer Timing
Established plants (year 2+):
Early spring (March-April): Apply balanced fertilizer as growth begins
After harvest (July): Light second application to support next year's growth
Organic options:
Blood meal or feather meal for nitrogen
Bone meal for phosphorus
Kelp meal for micronutrients
Balanced organic berry fertilizer
Signs of Nutrient Issues
Too much nitrogen: Excessive leafy growth, few flowers/fruit, soft canes prone to disease
Too little nitrogen: Pale leaves, weak growth, small fruit
Potassium deficiency: Leaf edge browning, poor fruit quality
Iron chlorosis: Yellow leaves with green veins (often a pH problem rather than true deficiency)
How Do You Prune and Manage the Two-Year Cane Cycle?
Pruning intimidates many gardeners, but it's essential for productive olallieberries. Understanding the cane lifecycle makes it straightforward.
No fruit this year
Train to trellis
Let it grow!
Harvest in June
Then dies
Remove after harvest
- After harvest (July): Cut all floricanes (just-fruited canes) at ground level
- Keep: This year's primocanes - they'll fruit next summer
- Winter: Thin primocanes to 4-6 strongest; shorten laterals
The Lifecycle Explained
Primocanes (Year 1):
Grow from the crown in spring/summer
Produce only leaves, no fruit
Overwinter and become floricanes
Floricanes (Year 2):
The same canes, now in their second year
Produce flowers and fruit
Die after fruiting
Your job: Remove floricanes after they fruit; preserve primocanes for next year's crop.
Post-Harvest Pruning (July)
Immediately after harvest:
Identify floricanes: These just produced fruit and have remnants of fruit clusters
Cut at ground level: Remove the entire cane
Remove from trellis: Pull the cut canes free and dispose (don't compost if disease is present)
Re-tie primocanes: Spread this year's growth across the now-empty trellis space
Don't delay this pruning. Leaving spent floricanes creates disease harbor and takes space from the productive new canes.
Winter Pruning (December - February)
During dormancy:
Remove weak canes: Keep only the strongest 4-6 primocanes per plant
Shorten laterals: Cut side branches to 12-18 inches to encourage fruiting spurs
Remove damaged or diseased wood
Secure canes to trellis: Tie remaining canes firmly before spring growth
Common Pruning Mistakes
Pruning at the wrong time: Removing primocanes in winter means no fruit next year
Leaving floricanes: They just take up space and harbor disease
Over-thinning: Leave enough canes for good production
Under-thinning: Too many weak canes produce small, sparse fruit
How Do You Control Spread and Suckers?
Olallieberries spread via root suckers and tip-rooting canes. Without management, they'll colonize your entire yard.
Managing Suckers
Mow or hoe suckers that appear outside the desired growing area
Check monthly during growing season
Root barriers: Buried edging can help contain spread
Preventing Tip Rooting
Olallieberry cane tips will root if they touch the ground, creating new plants. To prevent unwanted spread:
Keep canes on the trellis
Prune wayward growth
Check for rooted tips and remove if unwanted (or pot them up as new plants!)
Container Growing?
Growing berries in containers is possible but challenging for vigorous trailing types like olallieberries. You'd need:
Very large container (half wine barrel minimum)
Sturdy trellis system
Vigilant watering (containers dry quickly)
Annual soil refresh
In-ground planting is generally more successful and less work.
What Are the Most Common Olallieberry Problems and How Do You Fix Them?
Overly Vigorous, Tangled Growth
Problem: Canes everywhere, impossible to manage
Solutions:
More aggressive winter pruning (thin to fewer, stronger canes)
Train canes regularly during the growing season (don't let them tangle)
Consider wider spacing if replanting
Poor Fruit Set
Problem: Flowers but few or no berries
Possible causes:
Insufficient chill hours (warm winter)
Late frost damage to flowers
Poor pollination (rare; bees usually handle this)
Drought stress during flowering
Solutions:
Choose appropriate varieties for your microclimate
Protect flowers during late frost events
Ensure adequate water during bloom
Pest and Disease Issues
Powdery mildew: White powdery coating on leaves; common in foggy, damp conditions
Improve air circulation
Avoid overhead watering
Remove affected canes
Aphids and spider mites: Check undersides of leaves
Spray with water to dislodge
Use insecticidal soap if severe
Encourage beneficial insects
Cane diseases: Brown lesions, wilting canes
Remove and destroy affected canes
Improve sanitation
Avoid wetting foliage
Frequently Asked Questions
How many years until I get fruit?
You may see a few berries in year 1, but the first real harvest comes in year 2. Production increases through year 3-4, reaching full potential around years 4-6.
My canes grew 15 feet last year. Is that normal?
Yes! Olallieberries are vigorous growers. That's why trellising and annual pruning are essential. Train those long canes along your support structure and prune to manage the length.
Can I prune in summer to control growth?
You can tip primocanes in mid-summer to encourage branching and keep them manageable, but be judicious. The main pruning should happen post-harvest (removing floricanes) and in winter (shaping and thinning primocanes).
Why are my berries small?
Common causes: insufficient water during fruit development, too many canes competing for resources (thin more aggressively), or nutrient deficiency. Also, first-year harvests often produce smaller berries than mature plants.
The thorns are brutal. Any tips?
Long sleeves, thick leather gloves, and long-handled tools help. Some gardeners wear denim shirts dedicated to berry work. The thorns are the price of admission for these delicious berries. If thorns are truly a dealbreaker, consider thornless blackberry varieties instead.
What Does Your Olallieberry Year Look Like at a Glance?
Winter: Prune, plant, and prepare Spring: Water, weed, train new growth Summer: Harvest, then immediately prune spent canes Fall: Clean up, compost, and rest
Master this annual rhythm, and your olallieberries will reward you with abundant harvests for a decade or more. The work is front-loaded in establishing the trellis and learning the pruning cycle; after that, it becomes routine maintenance punctuated by the joyful frenzy of the June harvest.
Free Gardening Resources
Know Your Microclimate Worksheet: Understand your specific Santa Cruz County growing conditions
Seasonal Planting Calendar: Month-by-month guidance for Santa Cruz County
Water-Wise Gardening Guide: Strategies for managing water in our Mediterranean climate
Where Can You Find More Olallieberry Growing Guides?
Part of our Complete Olallieberry Series for Santa Cruz County:
Growing Olallieberries in Santa Cruz County: The Complete Guide - Everything you need to know about growing these California-born berries in our unique coastal climate
Olallieberry vs. Blackberry: What's the Difference? - Learn how olallieberries compare to other blackberry varieties and which grows best here
Harvesting and Using Olallieberries: From Garden to Pie - When to pick, how to store, and delicious ways to use your harvest
Olallieberry Troubleshooting Guide: Common Problems and How to Fix Them - Identify and solve powdery mildew, gray mold, pests, and other common issues