

Raising Chicks and Ducklings in Santa Cruz County
A few of the product links in this guide are affiliate links. If you buy through one, Ambitious Harvest may earn a small commission at no extra cost to you, which helps keep these guides free. We only point to gear we would use in our own Santa Cruz garden. As an Amazon Associate, we earn from Read our full disclosure.
Raising Chicks and Ducklings in Santa Cruz: A First-Timer's Guide
Raising chicks and ducklings successfully requires a heated brooder maintaining 95 degrees Fahrenheit in the first week, with temperature reduced by 5 degrees weekly until birds are fully feathered at 5 to 8 weeks old. Maintaining correct brooder temperature is one of the most important factors in chick and duckling survival. Chilled or overheated birds are far more likely to weaken and die, so getting the heat right in the first weeks matters more than almost anything else you buy.
Where Can You Buy Chicks and Ducklings Locally in Santa Cruz County?
Timing matters when sourcing baby birds. Chick season runs from roughly February through May in our area, with the best selection available in March and April. Knowing your local sources and their schedules helps you plan ahead rather than scrambling.
Westside Farm and Feed: This is the go-to local source for many flock keepers. They carry chicks seasonally, typically bringing in shipments weekly during peak season. Call ahead to find out what breeds are arriving and when. Stock moves fast, especially for popular breeds like Barred Rocks and Buff Orpingtons.
Corralitos Feed (Watsonville): Another reliable local option with seasonal chick availability. They tend to carry a good mix of standard laying breeds suitable for our coastal climate.
Local breeders: Check Craigslist (Santa Cruz section), Facebook groups for Santa Cruz County poultry, and community bulletin boards at feed stores. Local breeders often have breeds that are already adapted to our specific climate conditions, which gives the birds a head start. You may also find ducklings through local breeders, as feed stores carry ducklings less consistently than chicks.
Mail-order hatcheries: Murray McMurray, Cackle Hatchery, Meyer Hatchery, and Metzer Farms (Metzer specializes in waterfowl and is located in Gonzales, just south of us in Monterey County) all ship day-old birds. Minimum orders vary. Metzer Farms is particularly worth knowing about since they are local to the central coast and offer an excellent selection of duck and goose breeds.
Santa Cruz County Animal Shelter: While the shelter does not have baby birds, they occasionally have young chickens and ducks that need homes. For someone who wants to skip the brooder phase, a started bird from the shelter can be a great option. See How to Start a Backyard Flock in Santa Cruz County for more on the shelter adoption process.
When buying chicks, look for active, bright-eyed birds that are steady on their feet. Avoid chicks that are huddled, lethargic, or have pasty buildup around their vent (a condition called pasty butt that, while treatable, indicates stress). Ducklings should be alert, vocal, and responsive to movement.
What Do You Need for a Brooder Setup?
The brooder is your baby birds' entire world for the first 5 to 8 weeks of life. It needs to provide warmth, safety, food, water, and clean bedding. You do not need anything fancy, but you do need to get the basics right.
The container: Any clean, draft-free container that provides at least 1 square foot of floor space per chick (2 square feet per duckling, as they grow faster) works as a brooder. Common options include:
- Large plastic storage tubs (30 to 50 gallon): inexpensive, easy to clean, good for 4 to 6 chicks during the first couple of weeks. You will need to upgrade as they grow
- Galvanized stock tanks: durable, spacious, and reusable for years. A 100-gallon tank comfortably houses 6 to 8 chicks through the full brooder phase
- Cardboard boxes: free and easy to get, but they absorb moisture, cannot be sanitized, and need frequent replacement. A reasonable temporary option if you are caught unprepared
- Purpose-built wooden brooders: the most durable option if you plan to raise chicks regularly. Build from plywood with a removable bottom for cleaning
The walls need to be at least 12 inches high for chicks in the first week, increasing to 18 to 24 inches as they grow (chicks start flying at surprisingly young ages). A screen or mesh top prevents escape and protects from household pets.
Heat source: This is the most critical component. You have two main options:
Heat lamp with a 250-watt infrared bulb: The traditional choice. Inexpensive to purchase ($15 to $25 for the lamp and bulb) but carries a fire risk if not secured properly. The lamp must be clamped or hung securely so it cannot fall into bedding. Use a ceramic or metal lamp holder, not a plastic one. Keep the lamp about 18 inches above the brooder floor and adjust the height to control temperature. Heat lamps are a well-documented cause of barn and coop fires, so a secure clamp or chain and a ceramic socket are not optional.
Radiant heat plate (brooder plate): A safer, more energy-efficient alternative. Brands like Brinsea and Premier 1 make plates that sit on adjustable legs inside the brooder. Chicks huddle underneath for warmth, similar to a mother hen. No fire risk, lower electricity cost, and the chicks self-regulate by moving closer or farther from the plate. The upfront cost ($40 to $80) is higher, but the safety advantage is substantial. This is what I recommend, especially for brooders kept in garages or inside the house.
Bedding: Pine shavings are the standard. Use large-flake shavings, not sawdust (which chicks can inhale) and not cedar, whose aromatic oils can irritate a bird's respiratory system. For the first day or two, cover the bedding with paper towels so chicks can find their food easily without eating shavings. Start with 2 to 3 inches of shavings and add more as needed. Change bedding completely when it becomes damp or begins to smell.
For ducklings, replace pine shavings with rubber shelf liner or old towels for the first week, as ducklings eat shavings more readily than chicks and can develop crop impaction. After the first week, pine shavings are fine for ducklings.
Feeder: A standard chick feeder (gravity-fed trough or jar-base design) prevents birds from standing in their food. For 4 to 6 chicks, a single quart-size jar feeder is sufficient initially. As birds grow, upgrade to a hanging tube feeder that holds more feed and can be raised to back height to reduce spillage and contamination.
Waterer: A chick waterer with a narrow trough prevents drowning (chicks can drown in surprisingly shallow water). A quart-size base waterer works for the first few weeks. For ducklings, use a slightly deeper waterer that allows them to submerge their nostrils (they need to clear their nares of feed), but not so deep they can climb in. A chick waterer with marbles or clean pebbles in the trough prevents duckling drowning while allowing them to dip their bills.
How Do You Manage Brooder Temperature Week by Week?
Temperature management is where most first-timers either worry too much (checking the thermometer constantly) or too little (not adjusting for the birds' changing needs). Here is the week-by-week guide.
Week 1: 95 degrees Fahrenheit at the warmest spot in the brooder. This does not mean the entire brooder should be 95 degrees. Position the heat source at one end so the brooder has a warm zone and a cool zone. Chicks self-regulate by moving toward or away from the heat. If all chicks are huddled directly under the heat source, they are cold. If they are pressed against the far walls avoiding the heat, they are too warm. If they are spread evenly around the brooder with some under the heat and some not, the temperature is right.
Week 2: 90 degrees. Raise the heat lamp 2 to 3 inches or adjust the brooder plate height.
Week 3: 85 degrees.
Week 4: 80 degrees.
Week 5: 75 degrees.
Week 6 and beyond: 70 degrees, then begin weaning off supplemental heat entirely. By 6 weeks, most chicks are fully feathered and can handle room temperature. In our Santa Cruz County climate, where indoor temperatures rarely drop below 55 degrees even in winter, fully feathered chicks can transition off heat at 5 to 6 weeks without issue.
Ducklings feather out faster than chicks and generate more body heat. You can typically reduce duckling heat 5 degrees faster than the chick schedule, moving to no supplemental heat by 4 to 5 weeks in most cases.
A reliable thermometer at brooder floor level (where the birds actually are) is important, but watch the birds more than the thermometer. Their behavior is the best temperature gauge you have.
What Should You Feed Chicks and Ducklings?
Feeding requirements differ between chicks and ducklings in several important ways. Getting the feed right during these early weeks sets the foundation for healthy, productive adult birds.
Chicks (weeks 1 to 8): Feed a commercially formulated chick starter with 18 to 20% protein. Both medicated and unmedicated formulas are available. Medicated chick starter contains a coccidiostat (usually amprolium) that helps prevent coccidiosis, a common intestinal parasite. If your chicks were vaccinated for coccidiosis at the hatchery (check with your supplier), use unmedicated feed, as the medication interferes with the vaccine.
Ducklings (weeks 1 to 3): Feed unmedicated chick starter or, better yet, a waterfowl-specific starter if available. Do not feed medicated chick starter to ducklings. Amprolium, the coccidiostat in medicated chick starter, is not labeled for waterfowl, and ducklings are less prone to coccidiosis than chicks, so an unmedicated waterfowl or all-flock starter is the standard recommendation (Metzer Farms).
Ducklings (weeks 3 to 8): switch to a grower or flock-raiser formula around 17 to 20% protein, dropping the protein from the higher-protein starter to prevent leg and wing problems from overly rapid growth. Ducklings that stay on high-protein starter too long can develop leg problems due to excessively rapid growth. Niacin supplementation is important for ducklings. Add brewer's yeast to their feed (1 tablespoon per cup of feed) or provide niacin in their water (150mg per gallon). Niacin deficiency causes leg weakness and bowed legs in ducklings, according to the Merck Veterinary Manual.
Grit: Chicks and ducklings eating anything other than commercial feed (treats, greens, insects) need access to chick-sized grit (fine granite particles) to grind food in their gizzards. Offer grit free-choice in a small dish starting at one week of age.
Treats: Keep treats minimal during the brooder phase. Small amounts of finely chopped greens, scrambled egg (an excellent protein source), or mealworms can be offered after the first week, but commercial feed should make up at least 90% of their diet. Treats are fun but do not provide balanced nutrition.
Water: Clean, fresh water must be available at all times. Chicks and ducklings dehydrate quickly. Wash and refill waterers at least twice daily. Ducklings are incredibly messy with water, so expect to change their water frequently. They will splash, play, and fill their waterer with feed and bedding within minutes of a fresh fill. This is normal duck behavior, not a problem to solve.
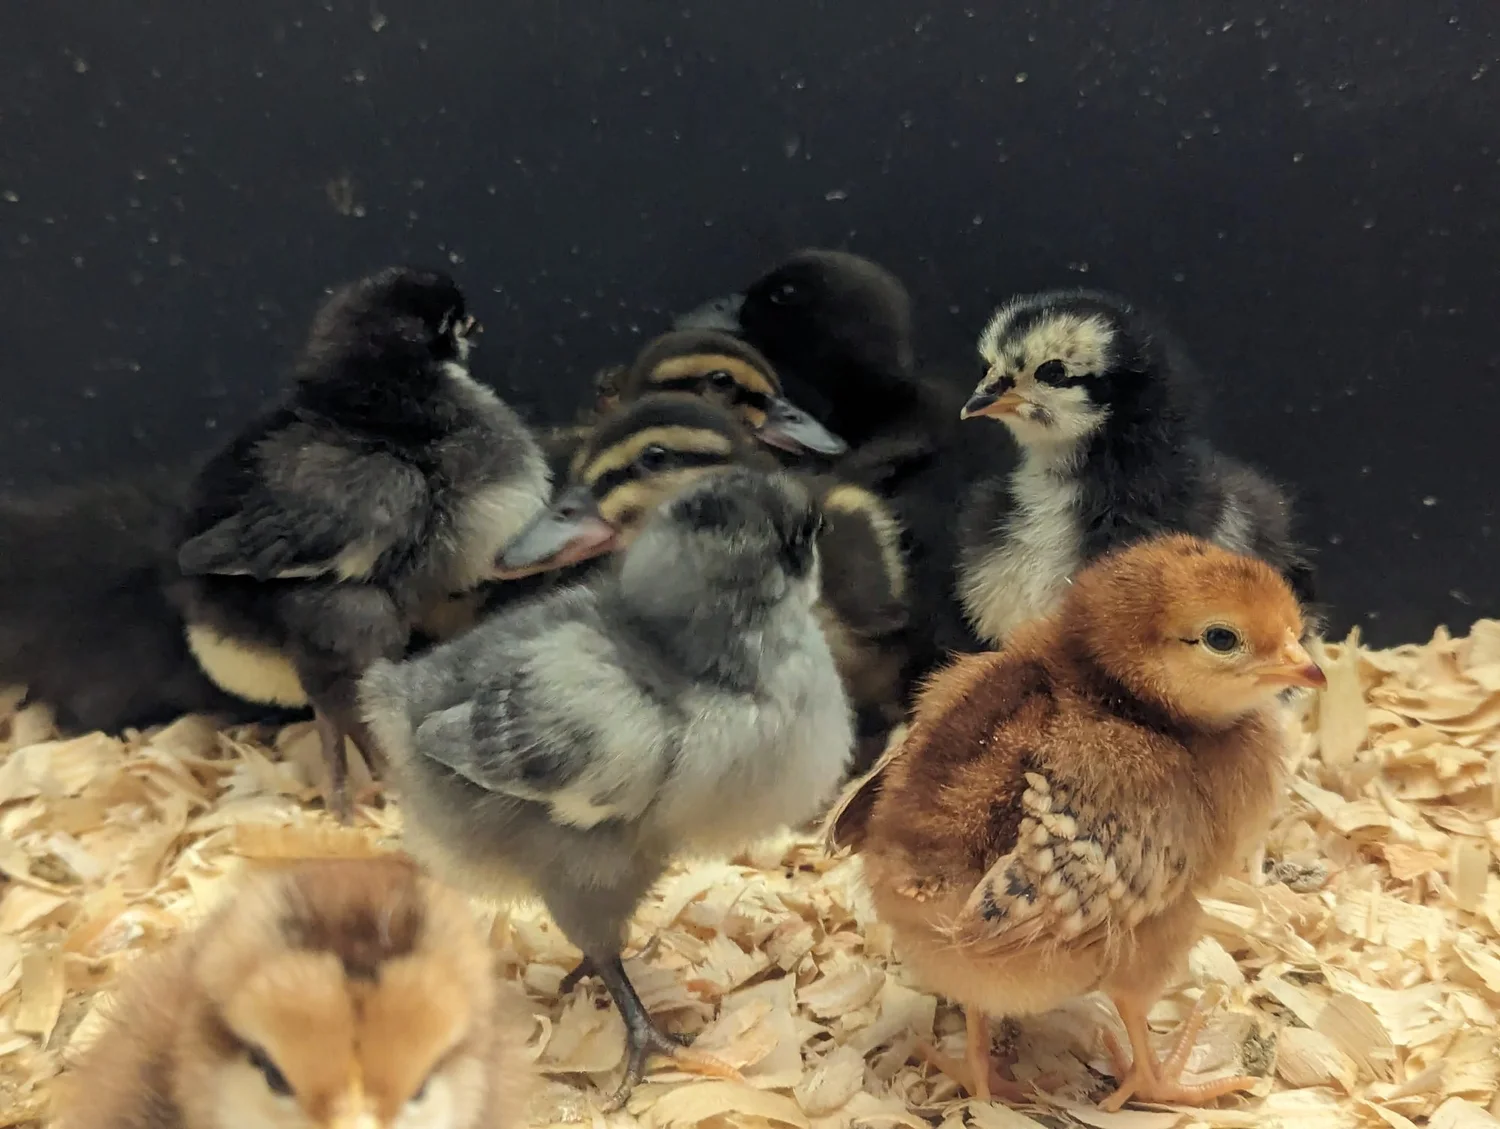
How Do Chicks and Ducklings Differ in the Brooder?
If you are raising both chicks and ducklings, you will quickly discover they are very different animals despite similar basic needs.
Growth rate: Ducklings grow much faster than chicks. A duckling will roughly double in size every week for the first several weeks. What starts as a fluffy yellow ball in week one is a half-feathered teenager by week three. This rapid growth means ducklings outgrow their brooder container faster and need space upgrades sooner.
Messiness: There is no polite way to say this. Ducklings are exponentially messier than chicks. They splash water everywhere, create wet bedding, and produce more waste per body weight. You will change duckling bedding more frequently, go through more pine shavings, and clean waterers more often. If raising both species together, put the ducklings on the side of the brooder with the waterer and accept that their half will be wetter.
Swimming: Ducklings are drawn to water instinctively, but they should not be given swimming water in the brooder during the first two weeks. Baby ducklings do not yet have waterproof feathers (their mother's oil gland provides waterproofing when they are brooded naturally). Supervised swim sessions in a shallow dish of warm water can begin at 2 weeks, for 10 to 15 minutes at a time. Always dry ducklings thoroughly and return them to the warm brooder afterward.
Hardiness: Ducklings are generally hardier than chicks. They tolerate temperature fluctuations better, are less susceptible to coccidiosis (though not immune), and feather out faster. The main duckling vulnerability is leg problems from niacin deficiency or excessively high protein feed, which is preventable with proper nutrition.
Social behavior: Ducklings imprint on their caretaker more strongly than chicks do. If you handle your ducklings frequently in the first few days, they will follow you, respond to your voice, and seek your company. This makes for wonderfully personable adult ducks but also means ducklings can be distressed when left alone. Raise at least two ducklings together so they have companionship.
Can you brood chicks and ducklings together? Yes, but with caveats. Separate their water access if possible (ducklings will soak everything), and monitor to make sure the ducklings' larger size does not lead to bullying. I prefer to brood them in adjacent containers so they can see and hear each other without the ducklings turning the chicks' bedding into a swamp.
When and How Do You Move Birds Outdoors?
The transition from brooder to outdoor coop is one of the most critical phases of raising young poultry. Moving birds out too early risks chilling. Moving them out too late stunts their development and makes the transition more stressful.
Timing: Fully feathered birds are ready for outdoor life. For most chicken breeds, this means 5 to 6 weeks old. For ducklings, 4 to 5 weeks. The key indicator is feathering, not age. When the bird has a full coat of juvenile feathers with no exposed patches of down, it can regulate its own body temperature.
In Santa Cruz County, our mild climate makes this transition easier than in colder regions. If your birds are moving outdoors in spring or summer, fully feathered youngsters can handle our typical nighttime lows of 45 to 55 degrees without supplemental heat. If you are transitioning birds in late fall or winter, you may want to provide a heat source in the coop for the first week or two until they acclimate.
Hardening off: Like transplanting seedlings, young birds benefit from a gradual transition. Start by placing the brooder outdoors (in a sheltered, predator-safe location) during warm afternoons for increasing periods. This lets them experience outdoor temperatures, sounds, and light conditions while still having the security of their familiar brooder. After a few days of outdoor exposure, they can move into the coop full-time.
First nights: Young birds may not understand that they should go into the coop at dusk. You will likely need to physically place them inside the coop for the first few evenings until they learn the routine. Close the coop door securely. By the third or fourth night, most birds figure out that the coop is where they sleep.
Introducing young birds to an existing flock: If you have adult birds, do not simply dump young birds into the run. Adult chickens can injure or kill young birds. Use a see-but-not-touch approach: house the young birds in a separate enclosure within or adjacent to the run for 1 to 2 weeks so the adult birds can see them without physical contact. Then allow supervised contact during free-range time before fully integrating. The young birds need places to escape and hide (under structures, behind barriers) when introduced, as the adults will establish pecking order through chasing and pecking.
Wait until young birds are close to adult size, usually around 12 to 16 weeks, before full integration. Adding much smaller birds to an established flock invites serious bullying. Do not rush this process.
What Common Problems Should You Watch for in the Brooder?
Most brooder problems are preventable with proper setup, but knowing what to watch for helps you catch issues early when they are most treatable.
Pasty butt (pasting): Droppings stick to the vent area and harden, potentially blocking the bird's ability to eliminate. Most common in the first week, often caused by temperature stress (too hot or too cold) or shipping stress. Check vents daily. If you see pasting, gently soften the dried droppings with a warm, damp cloth and remove them. Apply a small amount of coconut oil or petroleum jelly to the area to prevent recurrence. If untreated, pasty butt can be fatal.
Spraddle leg (splay leg): Legs slide outward on slippery surfaces, causing the chick to do the splits. Prevented by using non-slip brooder surfaces (paper towels over bedding for the first few days). If caught early, treatable by hobbling the legs together with a small bandage or hair tie at the correct width for 2 to 3 days. Poultry-extension resources have detailed treatment guides for spraddle leg in chicks, including how to hobble the legs at the correct width for a few days.
Temperature-related stress: Piling (all birds huddled together) indicates they are cold. Panting and spread wings indicate they are hot. Both are dangerous. Adjust heat immediately when you see these behaviors. Chilling is the more common problem in brooders that lose power or have poorly positioned heat sources.
Respiratory issues: Sneezing, wheezing, or nasal discharge in brooder-age birds can indicate poor ventilation (ammonia buildup from dirty bedding) or disease. Ensure the brooder has fresh air circulation without drafts. Change bedding before it develops an ammonia smell. If respiratory symptoms persist despite clean bedding and good ventilation, consult a veterinarian.
Picking and cannibalism: Stressed, overcrowded, or bored chicks may peck at each other, sometimes causing serious injury. Prevent this with adequate space, proper temperature, and environmental enrichment (a small roost, things to peck at, varied textures). Reduce brooder light intensity if picking occurs. Red or blue heat lamp bulbs can reduce picking behavior because they make blood less visible.
For ongoing health management as your birds mature, see What to Feed Your Backyard Flock Year-Round in California for nutritional guidance beyond the brooder phase.
How Do You Set Up the Brooder Space in Your Home?
Where you place the brooder matters for both the birds and your household. Baby poultry generate dust, noise, and odor that increase as they grow.
Location options, ranked:
- Garage or workshop: Best option. Separated from living space, usually has a concrete floor for easy cleanup, and provides temperature stability. Ensure the space is draft-free and predator-proof (garage doors closed, no gaps for rats or cats)
- Covered porch or enclosed outbuilding: Good option if temperature stays above 50 degrees at night and the space is secure from predators
- Spare bathroom or utility room: Workable for small numbers of chicks during the first few weeks. Tile floors clean easily, and ventilation is usually adequate. You will want to move the brooder out as the birds grow and the dust increases
- Living areas: Not recommended. The dust from growing chicks coats everything within a surprising radius, and the noise (especially ducklings) intensifies as they grow
Our Santa Cruz County climate is an advantage here. Even in winter, garage temperatures rarely drop below 45 degrees in most of the county, which means your heat source only needs to raise the temperature 50 degrees at peak (week one) and less each subsequent week. In warmer months, a garage brooder may need less supplemental heat than you expect.
Place the brooder on a surface that can handle water spills and bedding debris. A plastic tarp or old shower curtain under the brooder catches the inevitable overflow. Have a broom, dustpan, and trash bag nearby, because you will use them daily.
Good brooder hygiene is the foundation of healthy birds. Clean water, dry bedding, and proper temperature do more for your chicks and ducklings than any supplement or medication. Keep it simple, keep it clean, and your birds will thrive.
Frequently Asked Questions
How long do chicks need to stay in the brooder?
Most chicken breeds are fully feathered and ready to move outdoors at 5 to 6 weeks old. The determining factor is feathering, not a specific age. When juvenile feathers have replaced all the chick down, the bird can regulate its own body temperature. In our mild Santa Cruz County climate, fully feathered chicks can transition outdoors in any season, though a supplemental heat source in the coop is wise for winter transitions. Wait until birds are fully feathered before moving them off supplemental heat, regardless of the outdoor temperature. Feathering, not age, is the true readiness signal.
Can I raise chicks and ducklings together in the same brooder?
You can, but it requires extra management. Ducklings are much messier with water and grow faster than chicks, which can lead to wet bedding and size-based bullying. The best approach is adjacent brooders where the birds can see and hear each other without sharing space. If you must combine them, give ducklings their own water station and provide plenty of space. Never feed medicated chick starter to ducklings, as the coccidiostat (amprolium) is not FDA-approved for waterfowl and ducklings are less susceptible to coccidiosis (Metzer Farms; UC Davis Veterinary Medicine).
What temperature should the brooder be for the first week?
The warmest spot in the brooder should be 95 degrees Fahrenheit during week one. The entire brooder should not be 95 degrees. Create a temperature gradient with the heat source at one end so chicks and ducklings can self-regulate by moving toward or away from the heat. Watch the birds, not just the thermometer: huddled birds are cold, spread-out panting birds are hot, and evenly distributed active birds indicate the right temperature. Reduce the temperature by about 5 degrees each week until the birds are fully feathered, a schedule used across university poultry-extension brooding guides.
Where can I buy ducklings in Santa Cruz County?
Local feed stores carry ducklings less consistently than chicks, so call ahead during spring season (March through May). Metzer Farms in Gonzales, Monterey County, specializes in waterfowl and ships day-old ducklings with a wide breed selection. They are the closest waterfowl-focused hatchery to Santa Cruz. Local Craigslist and poultry Facebook groups are also good sources for ducklings from area breeders who may have breeds specifically suited to our coastal climate (Metzer Farms, metzerfarms.com).
Do ducklings need swimming water in the brooder?
No swimming water for the first two weeks. Baby ducklings lack the waterproof feather coating that adult ducks have (in nature, the mother's preen oil provides waterproofing). Wet ducklings can chill quickly. After two weeks, supervised swim sessions in shallow warm water for 10 to 15 minutes are fine. Dry ducklings thoroughly and return them to the warm brooder after swimming. Full water access can begin when ducklings are mostly feathered, around 4 to 5 weeks. Duckling drowning is a preventable management issue: shallow waterers and no unsupervised swimming for the first two weeks keep young ducklings safe.
What is pasty butt and how do I treat it?
Pasty butt occurs when droppings stick to and harden over a chick's vent, blocking elimination. It is most common in the first week of life and is usually caused by temperature stress during shipping or in the brooder. Check each chick's vent daily. If pasting is present, hold the chick's rear end in warm water for 30 seconds to soften the dried material, then gently remove it with a soft cloth. Apply coconut oil or petroleum jelly to prevent recurrence. Untreated pasty butt can be fatal, because the hardened droppings block the vent and stop the chick from eliminating. Check vents daily during the first week and clear any pasting promptly.
How much does it cost to set up a brooder?
A basic brooder setup costs $50 to $100. This includes a heat source ($25 to $80, with heat lamps on the low end and brooder plates on the high end), a container ($0 to $20, using a tub you already own or a cardboard box), a chick feeder ($5 to $10), a chick waterer ($5 to $10), pine shavings ($10), and a bag of chick starter feed ($15 to $20). The brooder plate is the single largest expense but pays for itself in fire safety and energy efficiency. Total ongoing cost during the brooder phase is mainly feed and bedding, roughly $10 to $15 per month.
When should I introduce young birds to my existing adult flock?
Young birds should be at least two-thirds the size of adult birds before full integration, which typically occurs at 12 to 16 weeks of age. Use a gradual introduction over 1 to 2 weeks: first visual contact through a fence or separate enclosure, then supervised free-range time together, and finally full integration with multiple food and water stations and hiding spots for the younger birds. Never introduce a single young bird to a group of adults, as it will be targeted. Introduce at least two or three young birds together. A gradual, staged introduction is the standard extension recommendation for flock safety.