

In-Bed Vermicomposting: Composting with Worms Directly in Your Garden Beds
A few of the product links in this guide are affiliate links. If you buy through one, Ambitious Harvest may earn a small commission at no extra cost to you, which helps keep these guides free. We only point to gear we would use in our own Santa Cruz garden. As an Amazon Associate, we earn from Read our full disclosure.
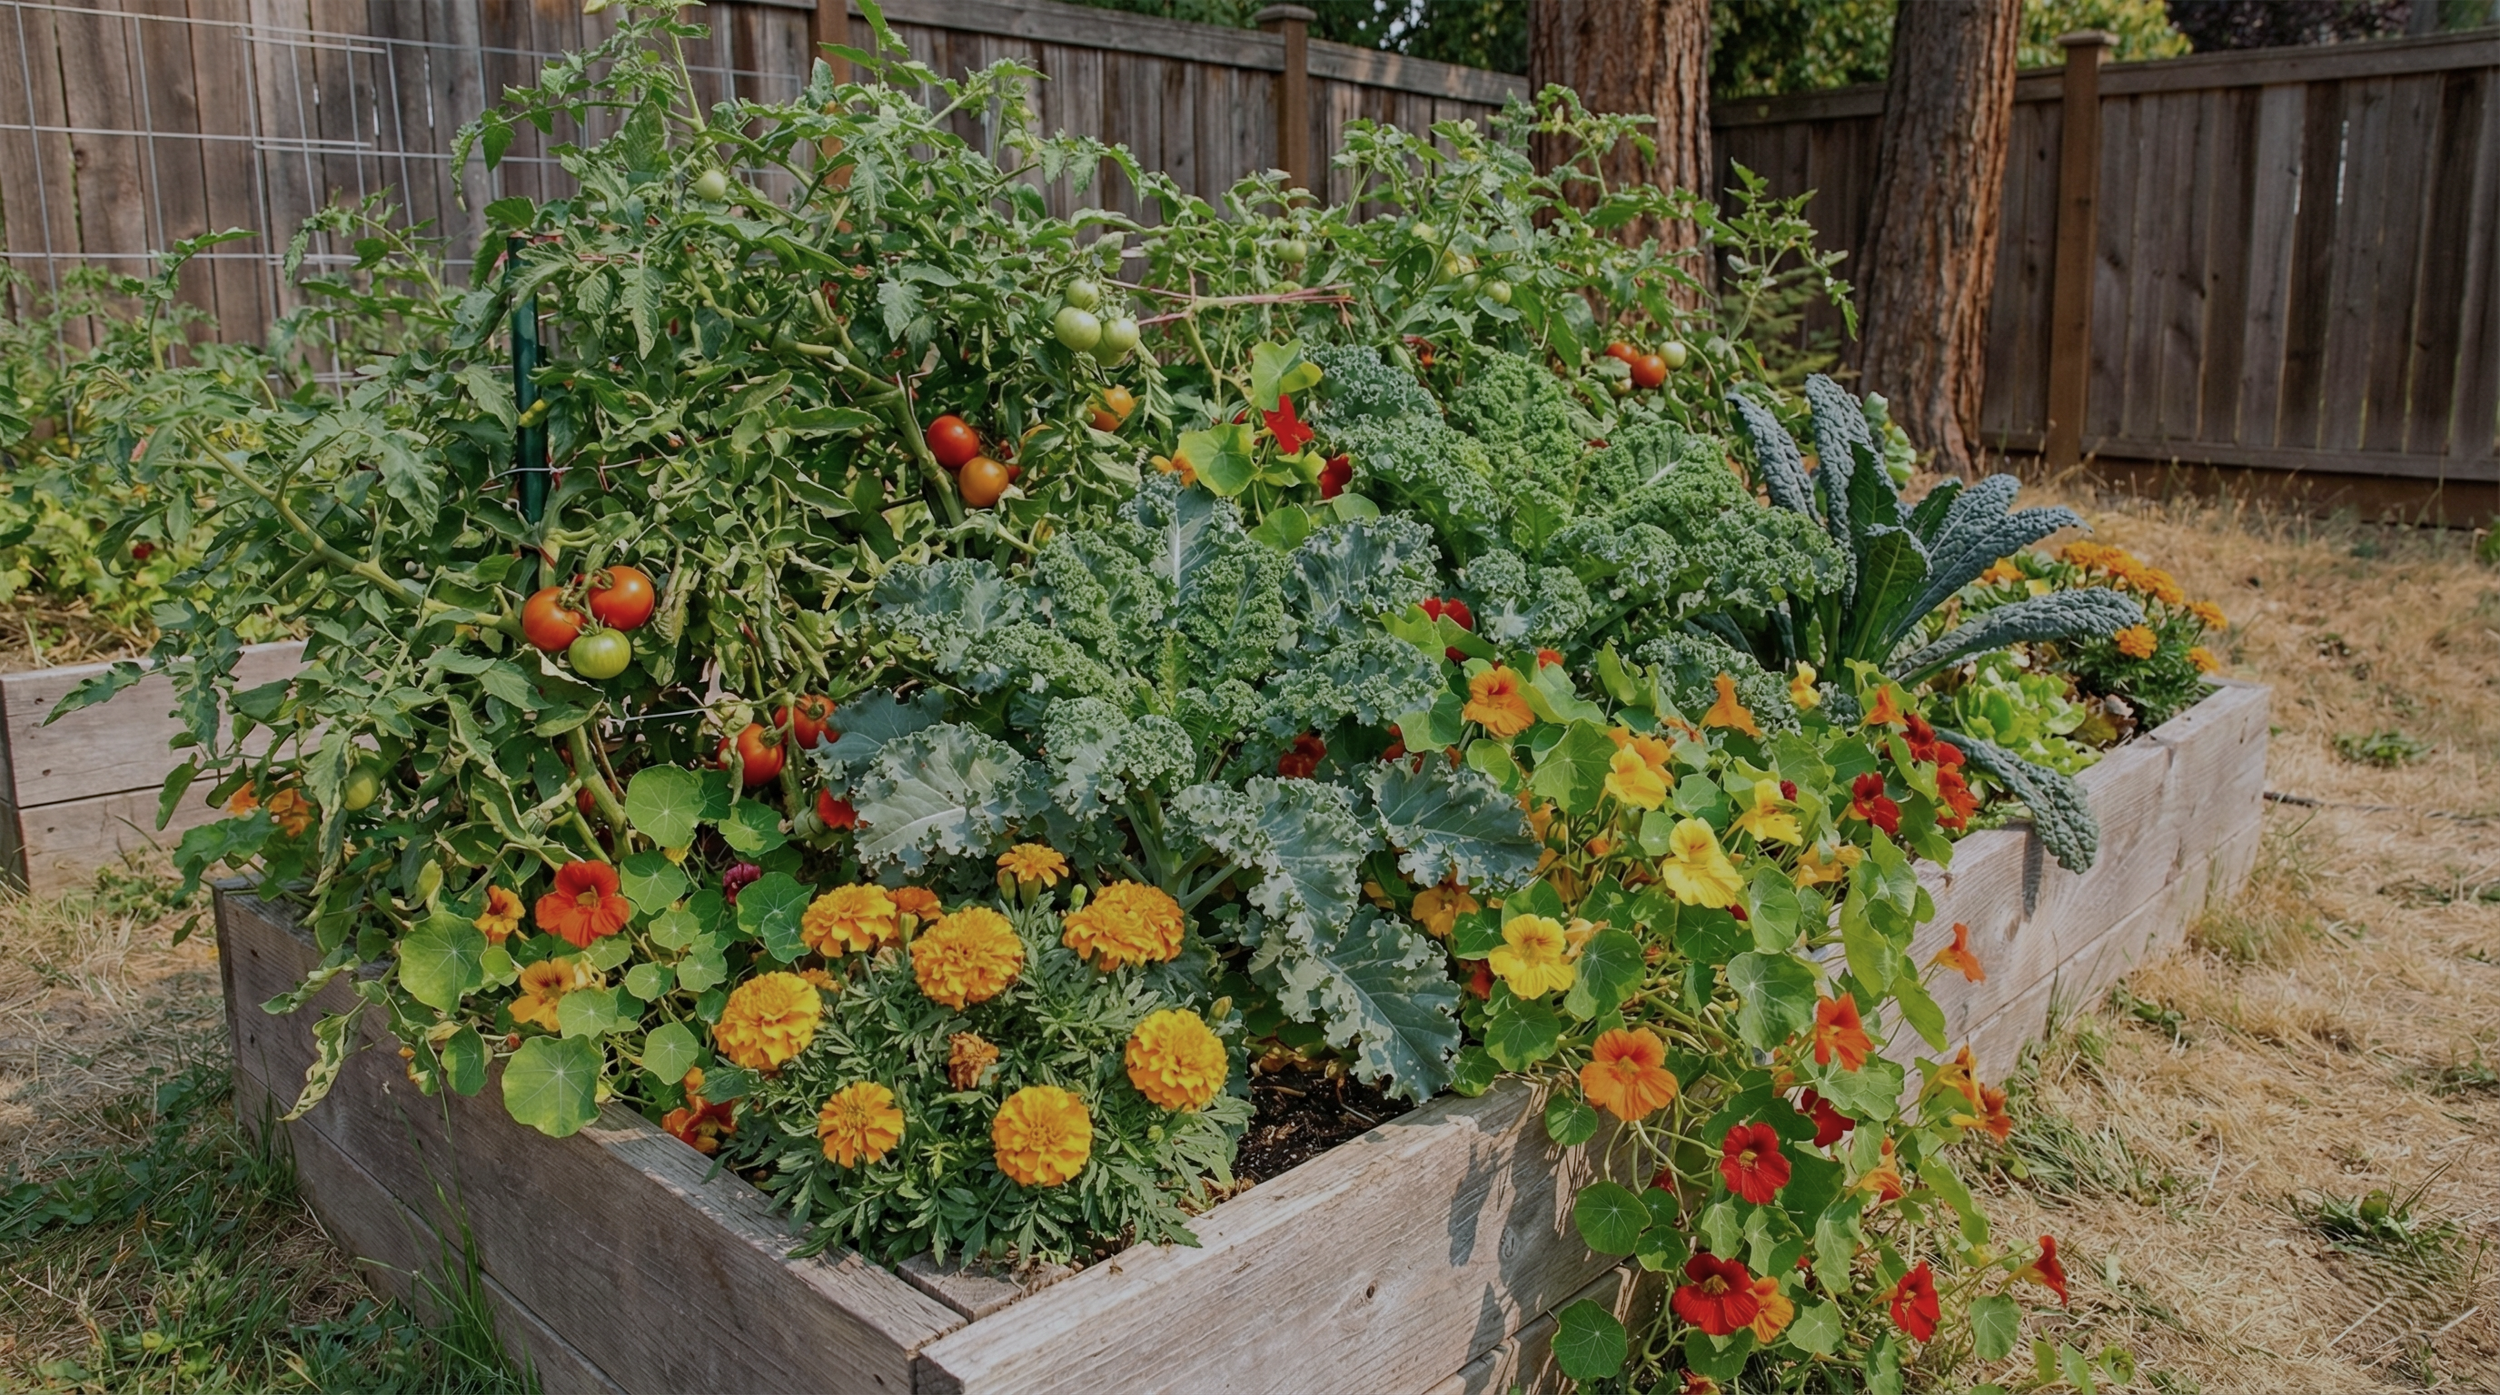
Skip the Bin, Feed the Bed
Traditional vermicomposting involves maintaining a worm bin, harvesting castings periodically, and then applying those castings to your garden. It works, but it's a lot of steps. What if you could skip the middleman and let worms do their work right where your plants grow?
That's the idea behind in-bed vermicomposting. Instead of keeping worms in a separate container, you introduce them directly to your garden beds and feed them there. The worms process organic matter exactly where you want the nutrients to end up. No harvesting, no transporting, no extra bins to manage.
This approach works particularly well in Santa Cruz County's mild climate. Our moderate temperatures mean worms can stay active in garden soil nearly year-round, unlike colder regions where they'd freeze or hotter regions where they'd cook. Our Mediterranean pattern of wet winters and dry summers does require some attention to moisture, but the basics are straightforward.
If you've been curious about vermicomposting but put off by the idea of maintaining a worm bin, in-bed composting might be the approach that finally makes sense for your garden.
How In-Bed Vermicomposting Works
The concept is simple: create conditions in your garden bed where composting worms can thrive, then feed them organic matter directly in the bed. The worms convert that material into castings (worm poop), which are among the best soil amendments available. The castings release nutrients slowly, improve soil structure, and support beneficial soil microorganisms. Research from UC Agriculture and Natural Resources confirms that worm castings are rich in iron, sulfur, calcium, nitrogen, phosphorus, and potassium.
Unlike worm bins, which concentrate worms in a small space, in-bed systems let worms move freely through your garden soil. They'll migrate to where food is available, then disperse through the bed to deposit castings. The result is an ongoing, distributed composting system that improves your entire growing area.
The Benefits
Nutrients delivered exactly where plants can use them. Worm castings don't need to be transported or applied. They're produced in place, right in the root zone.
Improved soil structure over time. Worm tunneling creates channels for air and water movement. Castings bind soil particles into stable aggregates that resist compaction and erosion.
Less work than traditional vermicomposting. No bin to maintain, no castings to harvest and apply, no bedding to manage separately. Feed the bed, and the worms do the rest.
Continuous rather than batch composting. Traditional bins fill up and need harvesting before you can add more material. In-bed systems accept material continuously because the processed matter becomes part of the soil.
Worms self-regulate. Population adjusts to food supply. Add more food, population increases. Add less, it stabilizes. You don't need to monitor worm numbers.
Works alongside regular gardening. You can plant, water, and harvest normally. The worms work around your plants, not in competition with them.
Is In-Bed Vermicomposting Right for You?
This method works well in many situations but isn't ideal for everyone.
It works best if you:
Have established raised beds or in-ground beds with decent soil
Generate moderate amounts of kitchen scraps (a household's worth, not a restaurant's)
Want to improve soil while disposing of organic waste
Prefer low-maintenance systems over hands-on management
Garden in a mild climate like Santa Cruz County's
It may not be ideal if you:
Need to process large volumes of material quickly
Want finished compost to use elsewhere (in containers, new beds, etc.)
Have very sandy or very heavy clay soil that needs significant amendment first
Garden in extreme heat or cold where worms can't survive in exposed soil
Have heavy gopher pressure (worms are gopher snacks)
Consider a traditional worm bin instead if you:
Want portable compost to use in containers or multiple locations
Don't have in-ground or raised bed space
Prefer more control over the composting process
Need to compost indoors or in a very small space
Many gardeners do both: a small worm bin for producing concentrated castings for seed starting and containers, plus in-bed composting for ongoing soil improvement in garden beds.
Getting started requires some initial setup, but once established, the system largely maintains itself.
Choose Your Beds
Start with one or two beds rather than your entire garden. This lets you learn the system before scaling up.
Good candidates:
Established raised beds with healthy soil
Beds that grow heavy feeders (tomatoes, squash, brassicas)
Beds you want to improve over time
Areas with consistent moisture (or where you'll water regularly)
Avoid for now:
Brand new beds with minimal organic matter
Very dry areas that you can't keep moist
Beds with known gopher problems
Areas that flood or stay waterlogged
Create Feeding Zones
You don't scatter food scraps randomly across the bed. Instead, designate specific feeding areas where you'll concentrate organic matter.
Trench method: Dig a trench 6 to 8 inches deep and 6 to 12 inches wide along one side of the bed or down the center. This is your initial feeding zone. As it fills and breaks down, dig a parallel trench and let the first one rest.
Hole method: Dig individual holes (roughly 8 to 10 inches deep and wide) at various points in the bed. Rotate among holes, filling one while others process. Works well in beds where you don't want to disturb a continuous trench.
Buried container method: Sink a 5-gallon bucket or large nursery pot (with holes drilled in the sides and bottom) into the bed, leaving the rim at or slightly above soil level. Add scraps to the container. Worms enter through the holes, process material, and carry castings throughout the bed. This is the neatest option and contains scraps well.
Add Initial Bedding
Before introducing worms, add a layer of carbon-rich bedding to your feeding zone. This provides initial habitat and balances the nitrogen-rich food scraps you'll add.
Good bedding materials:
Shredded newspaper or office paper (not glossy)
Torn cardboard (corrugated works well, remove tape)
Dried leaves (partially decomposed is fine)
Straw (not hay, which contains seeds)
Coconut coir (often sold at garden centers)
Add a 3 to 4 inch layer of bedding to your trench or hole, moisten it thoroughly (it should feel like a wrung-out sponge), and let it sit for a day or two before adding worms. The UC Master Gardeners of Napa County recommend about one-quarter pound of worms per cubic foot of bin space as a starting guideline.
Introduce Worms
You need composting worms, not the earthworms already in your soil. Composting worms (red wigglers, Eisenia fetida, are the most common) specialize in processing organic matter near the surface. According to UC Master Gardeners, red wigglers can consume up to three times their body weight each week. Regular earthworms do different work deeper in the soil.
How many worms? Start with about 1/2 to 1 pound of worms per bed. That's roughly 500 to 1,000 worms. They'll reproduce and population will adjust to your feeding rate.
Where to get worms:
Local sources are best. Ask at Santa Cruz County farmers markets since some vendors sell composting worms.
Bait shops sometimes carry red wigglers (ask to confirm species).
Online suppliers ship worms (Uncle Jim's Worm Farm, The Worm Factory, and others).
Get some from a friend with an established worm bin.
Santa Cruz County Worm Wranglers (if still active) sometimes has worms available.
How to add them: Place worms on top of the moist bedding, cover lightly with more bedding or a layer of burlap or cardboard, and leave them alone for a few days to settle in. Don't add food scraps for the first 3 to 5 days. Worms need time to adjust before they start eating enthusiastically.
Feeding Your In-Bed System
Once worms are established, you can begin adding kitchen and garden waste. The feeding process is simpler than traditional worm bins because you're not managing a contained space.
What Worms Eat
Excellent:
Vegetable scraps and trimmings
Fruit scraps and peels (chop large pieces)
Coffee grounds and filters
Tea bags and loose tea
Crushed eggshells (add calcium, help with grit)
Leafy greens and salad scraps
Squash, melon, and cucumber scraps
Bread and pasta (in moderation)
Rice (plain, in moderation)
Use sparingly:
Citrus peels (acidic, slow to break down; chop small if using)
Onions and garlic (worms aren't fans, use in small amounts)
Spicy peppers (capsaicin deters worms)
Oily or fatty foods (slow to break down)
Dairy (can smell, attracts pests; small amounts only)
Meat and fish (attracts pests, smells; avoid in this system)
Never add:
Pet waste (health hazard)
Diseased plant material (may spread problems)
Weed seeds (may survive and germinate)
Glossy paper or plastic-coated materials
Treated wood or sawdust from treated lumber
How to Feed
Bury, don't scatter. Always bury food scraps under 3 to 4 inches of bedding, mulch, or soil. This prevents odors, deters fruit flies and other pests, and keeps scraps from drying out.
Chop or tear large pieces. Smaller pieces break down faster. You don't need to mince everything, but halving a melon rind or tearing up corn cobs helps.
Feed regularly but don't overload. Add scraps once or twice a week. Start with small amounts and increase as you observe the worms keeping up. Uneaten food that sits for weeks indicates overfeeding.
Rotate feeding spots. If using trenches or holes, rotate where you add food. This gives worms time to process one area while they work on another, and distributes castings throughout the bed.
How Much to Feed
A pound of worms can process roughly half their body weight in food per day under ideal conditions. In practice, start conservatively: a quart or two of scraps per week for a new bed. Increase as worms multiply and you observe material disappearing.
In Santa Cruz's cooler months (December through February), worm activity slows. Feed less during this time. In warm months (May through October), worms are most active and can handle more material.
Maintaining the System
In-bed vermicomposting requires less maintenance than traditional bins, but some attention keeps the system healthy.
Moisture Management
Worms need consistently moist (but not waterlogged) conditions. This is the most important factor in their survival.
During dry season (May through October): Santa Cruz's dry summers can dehydrate your feeding zones. Regular irrigation for your plants often provides enough moisture, but check the feeding areas specifically. The bedding should feel like a damp sponge. If it's drying out, water more thoroughly or cover with additional mulch.
During wet season (November through April): Usually not a problem in well-drained raised beds. In-ground beds with heavy soil may stay too wet. If feeding zones become waterlogged and start to smell, stop adding food until they drain and add more carbon-rich bedding.
Signs of moisture problems:
Worms clustering at the surface (too dry below, or too wet and anaerobic)
Foul odors (too wet, anaerobic conditions)
Worms leaving the area (conditions have become inhospitable)
Temperature Considerations
Red wigglers thrive between 55°F and 77°F and remain active down to about 40°F. The UC Master Gardeners of Orange County note that worms are most productive in this temperature range, eating more and producing the most castings. They'll die if frozen or if temperatures exceed 95°F.
Santa Cruz advantage: Our mild climate keeps soil temperatures in the comfortable range almost year-round. Worms in garden beds rarely face the temperature extremes that challenge worm bins.
Summer: Hot inland areas (Boulder Creek, Watsonville) may see surface soil temps that are too warm. Deep mulch over feeding zones insulates against heat. Worms will move deeper if the surface gets too warm.
Winter: Frost is rare in most of Santa Cruz County, but if your area does experience frost, worms will move deeper in the soil where temperatures stay stable. They'll survive normal Santa Cruz winters without intervention. In colder mountain locations, add extra mulch over feeding areas for insulation.
Occasional Turning
Light cultivation of the feeding zone (not deep digging) helps:
Incorporate surface bedding into the soil
Aerate compacted areas
Distribute castings
Check on conditions
Turn feeding areas gently every few weeks, being careful not to injure worms. A hand fork or cultivator works better than a full-sized spade.
Adding Bedding
As food breaks down, the feeding zone gradually fills with castings and compacts. Periodically add fresh bedding material (shredded paper, dry leaves, straw) to maintain structure and carbon balance. This also gives worms fresh habitat.
If the feeding zone starts to smell or feel dense and sludgy, you're probably low on bedding (carbon) relative to food waste (nitrogen). Add more bedding and pause food additions until conditions improve.
What Are Common Problems?
Worms Are Gone or Numbers Seem Low
Possible causes:
Too dry: Worms moved elsewhere seeking moisture
Too wet and anaerobic: Conditions became inhospitable
Too little food: Population declined to match supply
Predators: Ground beetles, birds, or gophers ate them
Solutions:
Check moisture levels and adjust
Ensure feeding zones have adequate food
If predators are the issue, consider buried container method for protection
Add more worms if population crashed
Unpleasant Odors
Cause: Anaerobic conditions from too much moisture, too much food, or insufficient carbon (bedding).
Solutions:
Stop adding food scraps temporarily
Add lots of dry bedding material (shredded paper, cardboard, straw)
Turn the area lightly to introduce air
Ensure drainage is adequate
Reduce feeding rate once conditions improve
Fruit Flies or Pests
Cause: Food scraps are exposed or too close to the surface.
Solutions:
Bury scraps more deeply (at least 3 to 4 inches)
Cover feeding areas with cardboard or burlap
Add dry bedding over food deposits
Reduce amount of fruit scraps temporarily
Food Isn't Breaking Down
Causes:
Too few worms
Too cold (winter slowdown)
Too dry (worms are inactive)
Overfed relative to worm population
Solutions:
Be patient; winter slowdown is normal
Check moisture and add water if needed
Reduce feeding rate
Allow time for worm population to increase
Worms at the Surface
Causes:
If scattered: Probably normal foraging behavior
If clustered: May indicate problems below (too wet, too dry, anaerobic)
Solutions:
Check conditions below the surface
Adjust moisture or aeration as needed
In heavy rain, this is normal escape behavior; they'll return when conditions improve
Integrating with Your Gardening
In-bed vermicomposting works alongside normal gardening activities. Here's how to make them work together.
Planting Around Feeding Zones
Keep feeding trenches or holes away from main plant stems (12+ inches). Worms and castings will spread through the bed, but concentrated decomposing matter can be too intense for roots directly adjacent.
As the season progresses, rotate feeding zones to different parts of the bed, which distributes benefits and avoids concentration.
Seasonal Rotation
Spring/Summer beds (tomatoes, squash, etc.): Feed zones during the growing season. Worms process material, and castings benefit heavy-feeding crops.
Fall/Winter beds (brassicas, greens): Continue feeding at reduced rate. Worms remain active through mild winters.
Between seasons: Empty beds are ideal for intensive feeding. Add more material than usual while no plants are growing.
Harvesting and Disturbing the Soil
Normal harvesting won't bother worms. Pulling carrots or beets temporarily disrupts their habitat, but they adapt quickly.
Heavy digging or turning (like preparing for new plantings) will disturb worms more significantly. They'll survive but may move to less-disturbed areas. If you're turning a bed heavily, avoid the feeding zones or relocate worms temporarily.
Scaling Up
Once you're comfortable with one or two beds, you can expand the system.
Add more beds: Apply the same approach to additional beds.
Increase feeding zones: Add more trenches or buried containers as your kitchen waste output and worm population grow.
Worms migrate: As conditions improve in new beds, worms will colonize them naturally from adjacent areas. You can also transplant a scoop of worm-rich material from established beds to new ones.
Connect to other composting: Many gardeners use in-bed vermicomposting as part of a larger composting system. A traditional hot compost pile handles large volumes of material; finished compost feeds beds periodically. In-bed worms process kitchen scraps and maintain ongoing soil fertility.
Worm beds are also a reminder that you do not need a compost tumbler to make good compost.
Frequently Asked Questions About In-Bed Vermicomposting
Do the worms stay in the bed or will they spread throughout my garden?
Worms will move where conditions are favorable. They'll concentrate in areas with food and moisture but migrate throughout connected soil over time. This is generally good since it means your whole garden benefits. In raised beds, they may stay contained if the bed is isolated. In connected in-ground beds, expect them to spread gradually.
Will worms survive Santa Cruz winters?
Yes. Our mild winters keep soil temperatures well above freezing in most areas. Worms may slow down in December and January but remain active at reduced levels. In colder mountain locations, add extra mulch over feeding zones for insulation, but worms will generally survive.
Can I use worms from my garden instead of buying red wigglers?
The earthworms naturally present in your soil (nightcrawlers, garden worms) are valuable but different from composting worms. They work deeper in the soil, processing mineral particles and creating channels. Composting worms (red wigglers) specialize in processing organic matter near the surface. For in-bed composting, you want red wigglers. That said, once you introduce composting worms, they'll coexist with your existing earthworm population, and your soil will benefit from both.
How do I know if the system is working?
Look for: Dark, granular castings accumulating in and around feeding zones. Healthy worm population visible when you gently dig in feeding areas. Food scraps disappearing within 1 to 3 weeks of adding. Improved soil texture over time. Plants growing vigorously. If you're seeing these signs, the system is working.
What about gophers eating the worms?
Gophers do eat worms, and heavy gopher pressure can make in-bed vermicomposting frustrating. If gophers are active in your area, consider: Using the buried container method (harder for gophers to access), lining raised beds with hardware cloth (protects the entire bed), or keeping worm composting in bins rather than beds in high-pressure areas.
Can I do this in containers rather than garden beds?
Technically yes, but it becomes more similar to traditional vermicomposting. The advantage of in-bed systems is the large volume and connection to garden soil. Large containers (half-barrels, stock tanks) can work, but small pots don't have enough volume for stable conditions.
What if I go on vacation?
Worms are forgiving. They can go weeks without new food, especially if they have unprocessed material remaining. Before a trip, add food and extra bedding, water thoroughly, and mulch the area well. The system will be fine for a few weeks.
Is there any smell?
A properly managed system should have no unpleasant odor. The earthy smell of healthy soil, yes. Bad smells indicate problems (usually anaerobic conditions from overfeeding or waterlogging). If you smell something off, see troubleshooting section above.
Free Composting and Soil Resources
Download these guides to support healthy soil in your garden:
Garden Troubleshooting Guide -- Diagnose and solve common garden problems.
Companion Planting Guide -- Plants that work well together in garden beds.
Seasonal Planting Calendar -- What to plant when in Santa Cruz County.
Know Your Microclimate Worksheet -- Understand your garden's specific conditions.
Worms Doing the Work
In-bed vermicomposting is one of those gardening methods that makes you wonder why anyone does it differently. You're already growing plants in beds. You're already generating kitchen scraps. Why not bring those two streams together and let worms handle the conversion?
The system requires some setup and learning, but once established, it largely runs itself. Worms multiply when food is plentiful, contract when it's scarce. They survive our mild winters and work through our warm summers. They convert scraps to castings and deposit those castings exactly where your plants can use them.
It's not the right approach for everyone. If you need finished compost for containers, or if gopher pressure is severe, a traditional worm bin might serve you better. But for gardeners who want to improve their beds with minimal extra work, in-bed vermicomposting is worth trying.
Start with one bed, one feeding zone, and a pound of worms. See how it goes. If it works, expand. If it doesn't suit your situation, you've learned something. The worms won't hold it against you.